¶ Overview of the site rights management page
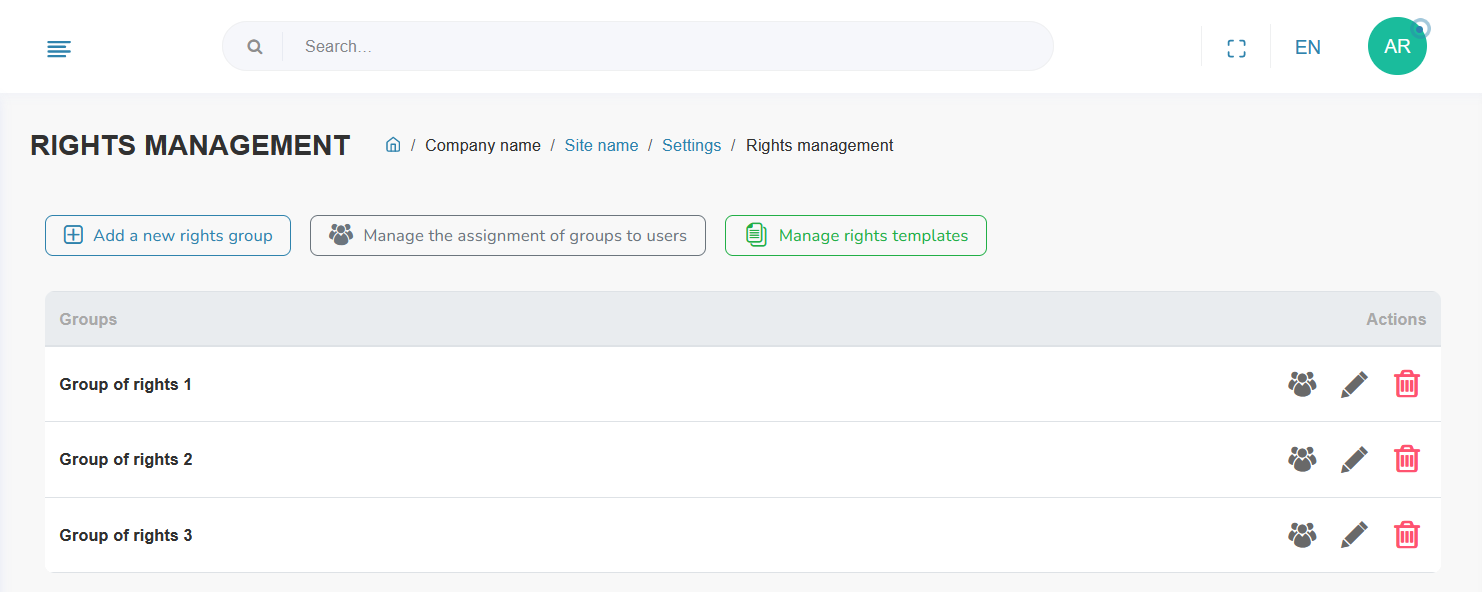
The page takes the following form:
- at the top, you'll find buttons for adding a new rights group, managing the assignment of users to a group and managing rights templates.
- below, you'll find a table listing the rights groups configured on your site.

¶ Add/Edit a right group
For adding a right group, click on the "Add a new right group" button in the top left-hand corner.
For editing a right group, click on the pencil icon on the line of the right group you wish to edit.
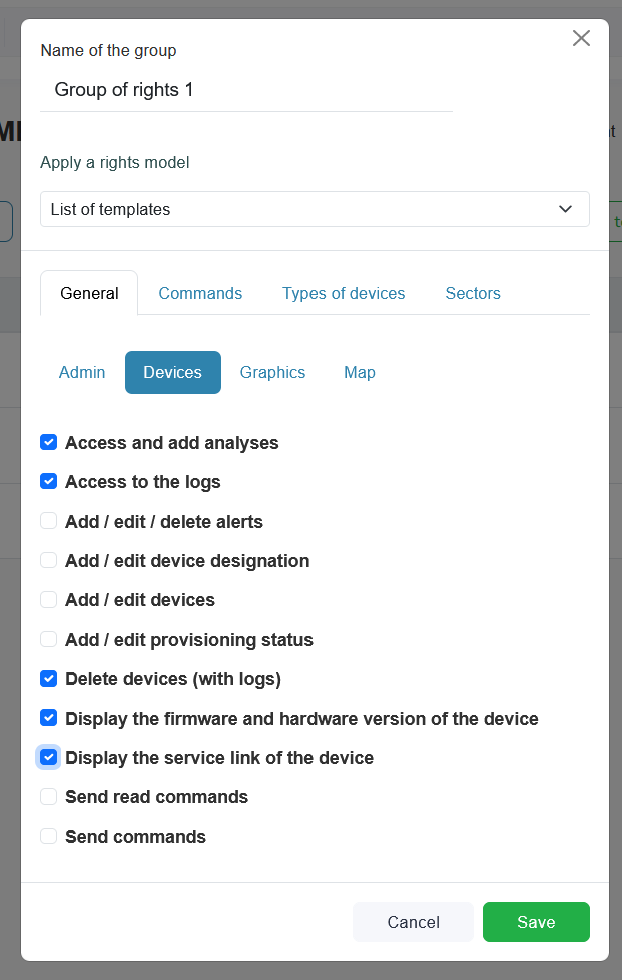
In both cases, you are presented with the following pop-up window:

You must enter the following information:
- group name
- the list of authorized rights for group members. You can either:
- Apply rights from a template by selecting it from the corresponding list
- Manually tick the rights to be associated with the group on each tab.
- Note that it is possible to apply a template, then modify/overload the values pre-filled by the template.
At the end, you can save your changes by clicking on "Save".
¶ Add/Edit a right group template
Templates save time by creating standard models. For example, you can create a template for your administrator groups and then, as soon as you create a new group for them, you'll have, for example, all the rights selected.
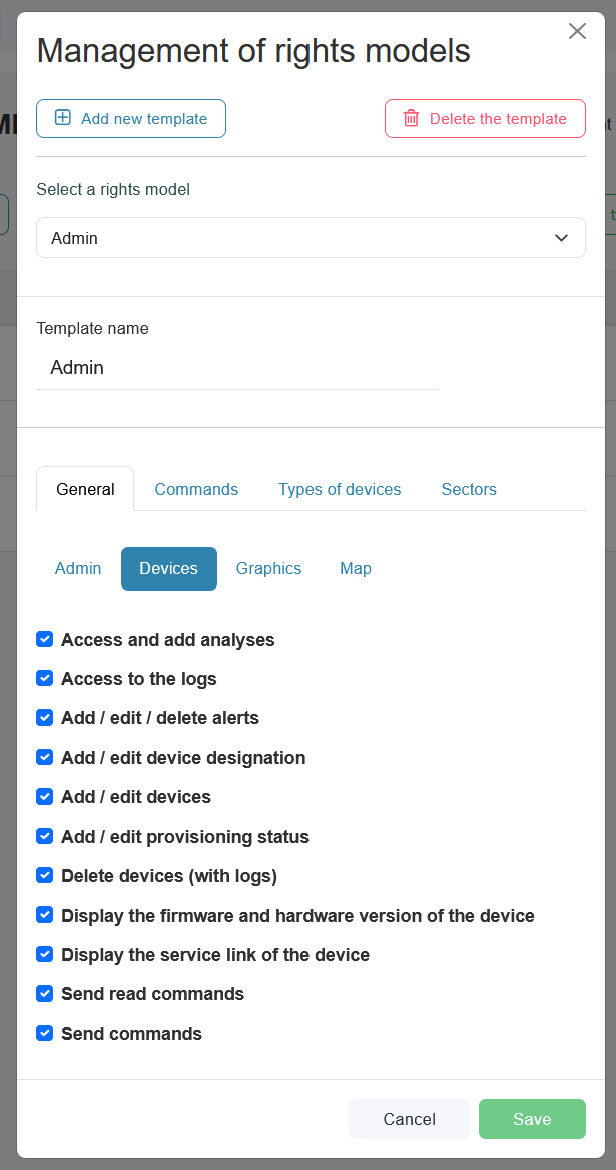
To manage your rights templates, click on the "Manage templates" button above the table on the right. A pop-up window like the one below appears.

Here you can select a template to edit, or create a new one by clicking on the "Add template" button. In the latter case, you must enter the name.
You can then select the rights to be pre-checked when the user chooses this template by creating a rights group.
You can delete a template by clicking on the delete button at the top right of the pop-up window, after selecting the template you want to delete from the drop-down menu.
¶ Assign users to a right group
¶ List users in a group
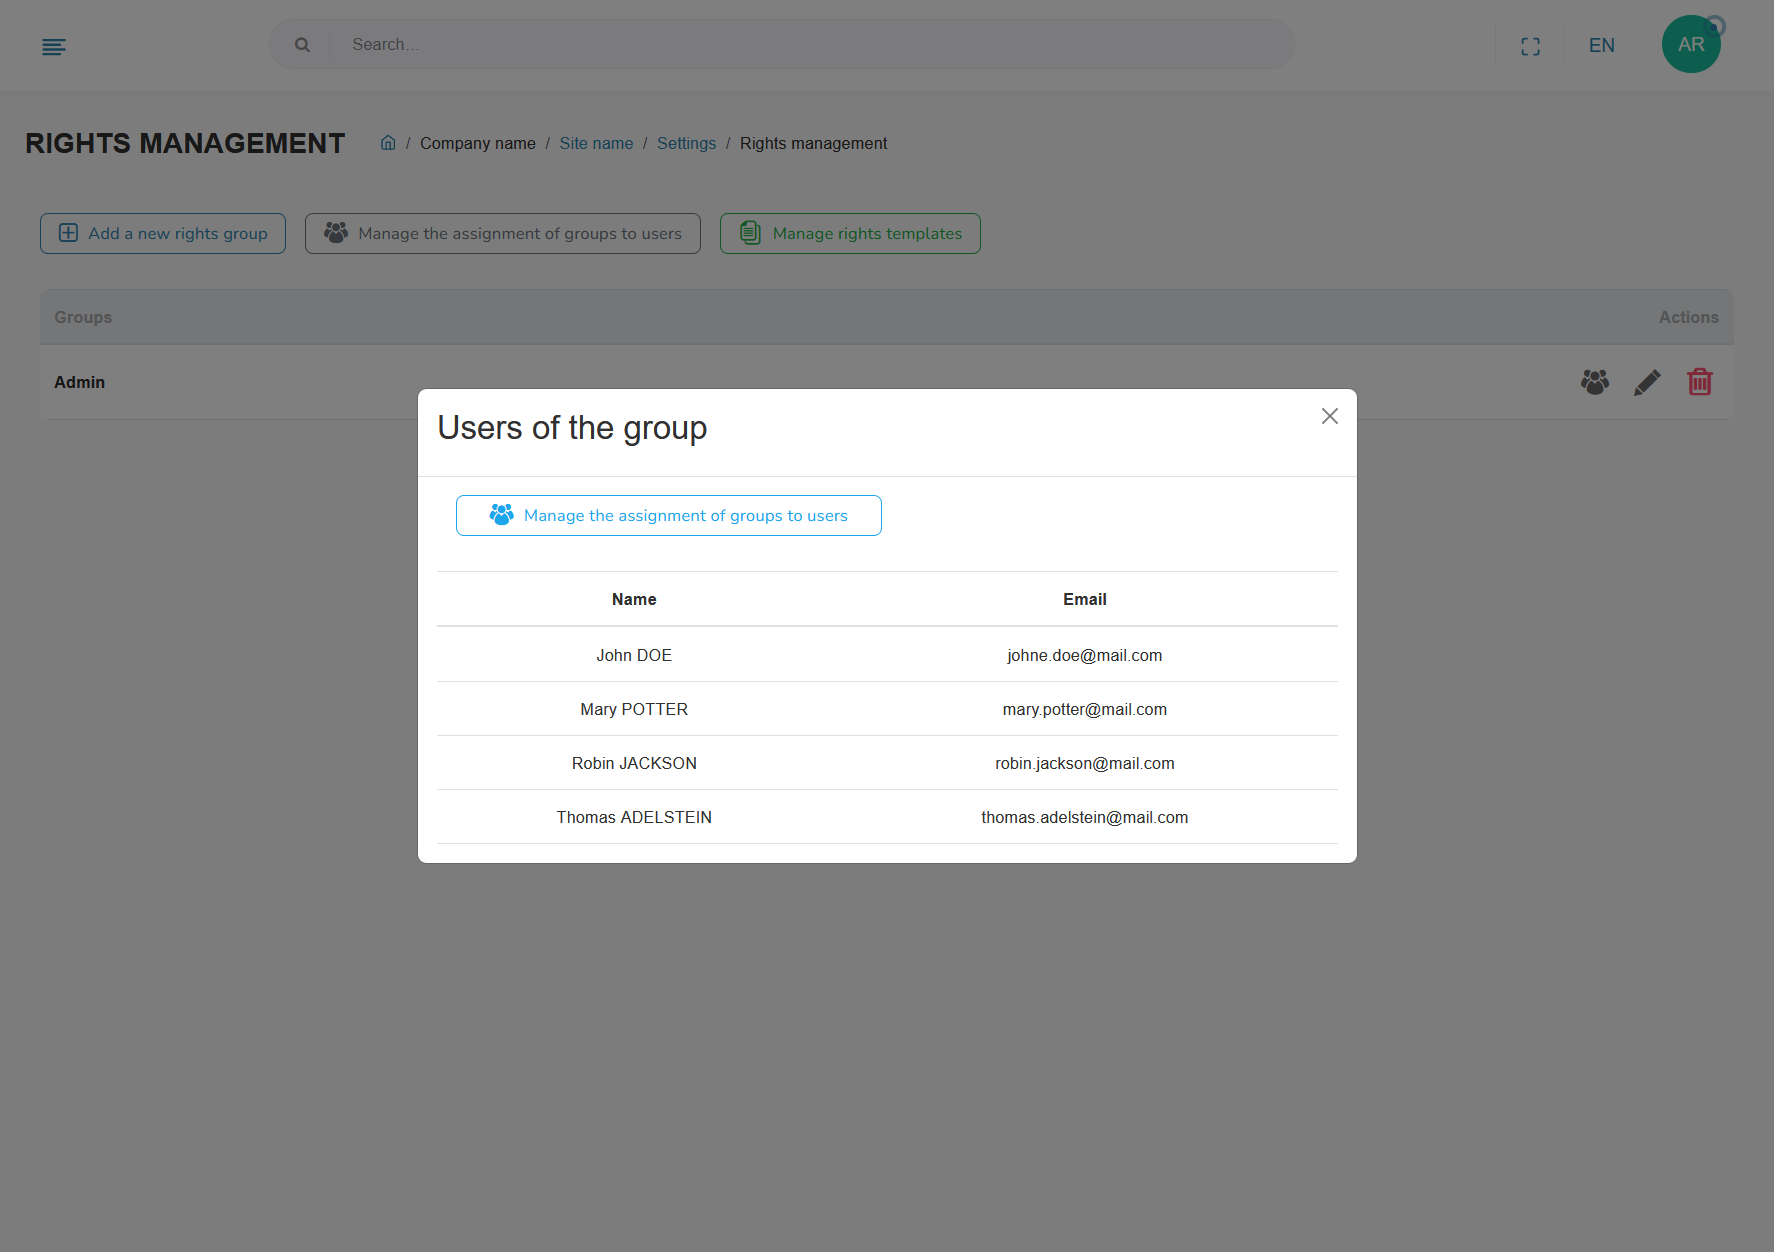
You can list the users in a group by clicking on the three-person group icon next to the group whose users you want to see in the table.
¶ Changing a user group
It is not possible to change the rights groups of users using the LDAPS external authentication provider. In this case, groups must be changed/assigned directly in the LDAPS registry.
To manage the assignment of users to rights groups, click on the "Manage user group assignment" button at the top of the table.
A pop-up window that looks like this opens.

You can then select the right group for each user.