Adding or editing widgets is only possible on a computer
, not on a smartphone!

¶  Introduction
The widget creation and editing process is identical for map, table and history widgets.
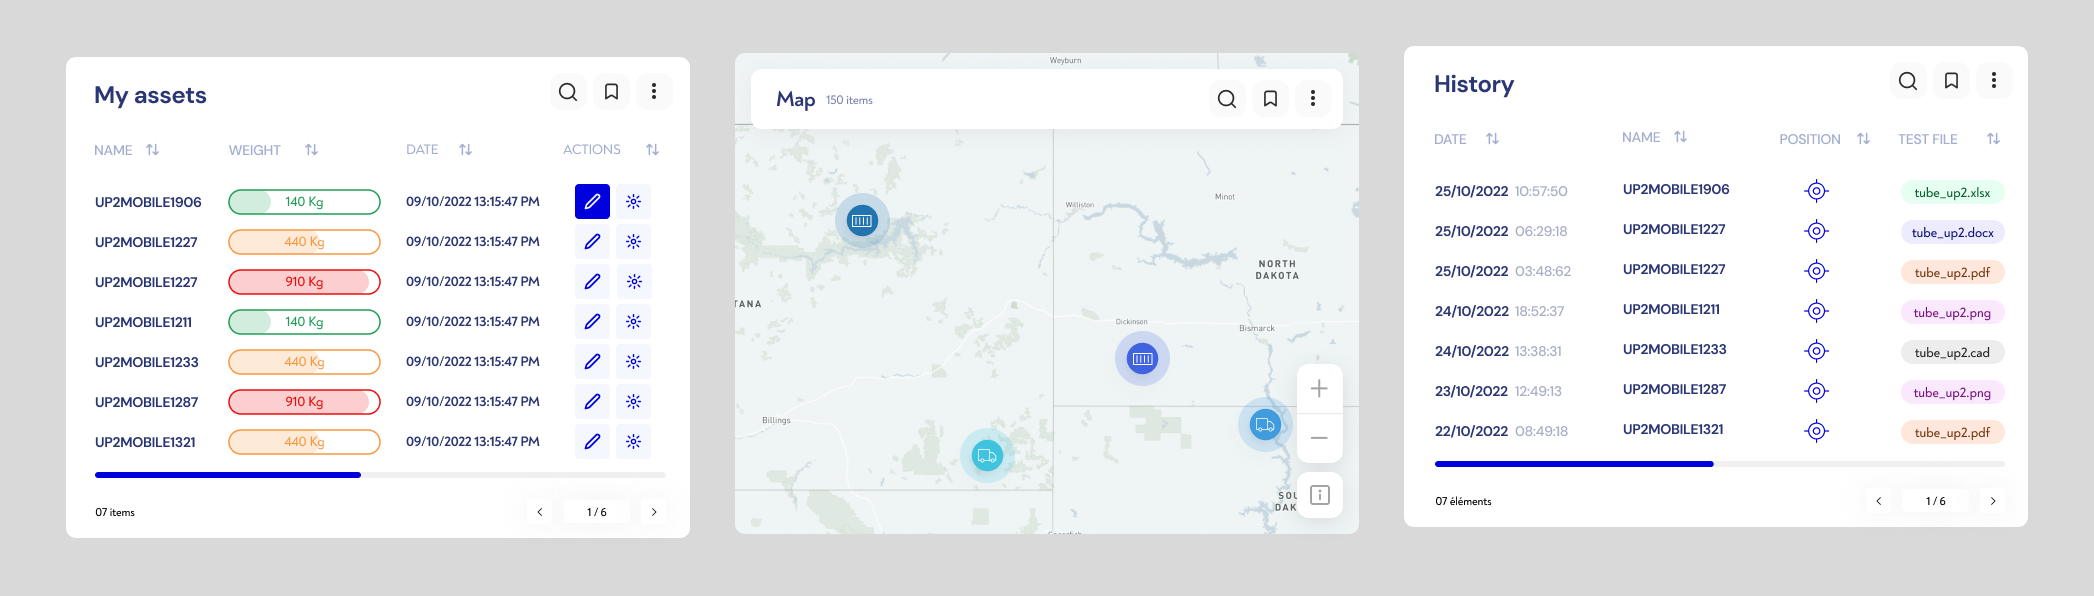
It works in 4 stages, described below.
For each step, you can see the impact of your configuration changes in the preview panel on the left. 
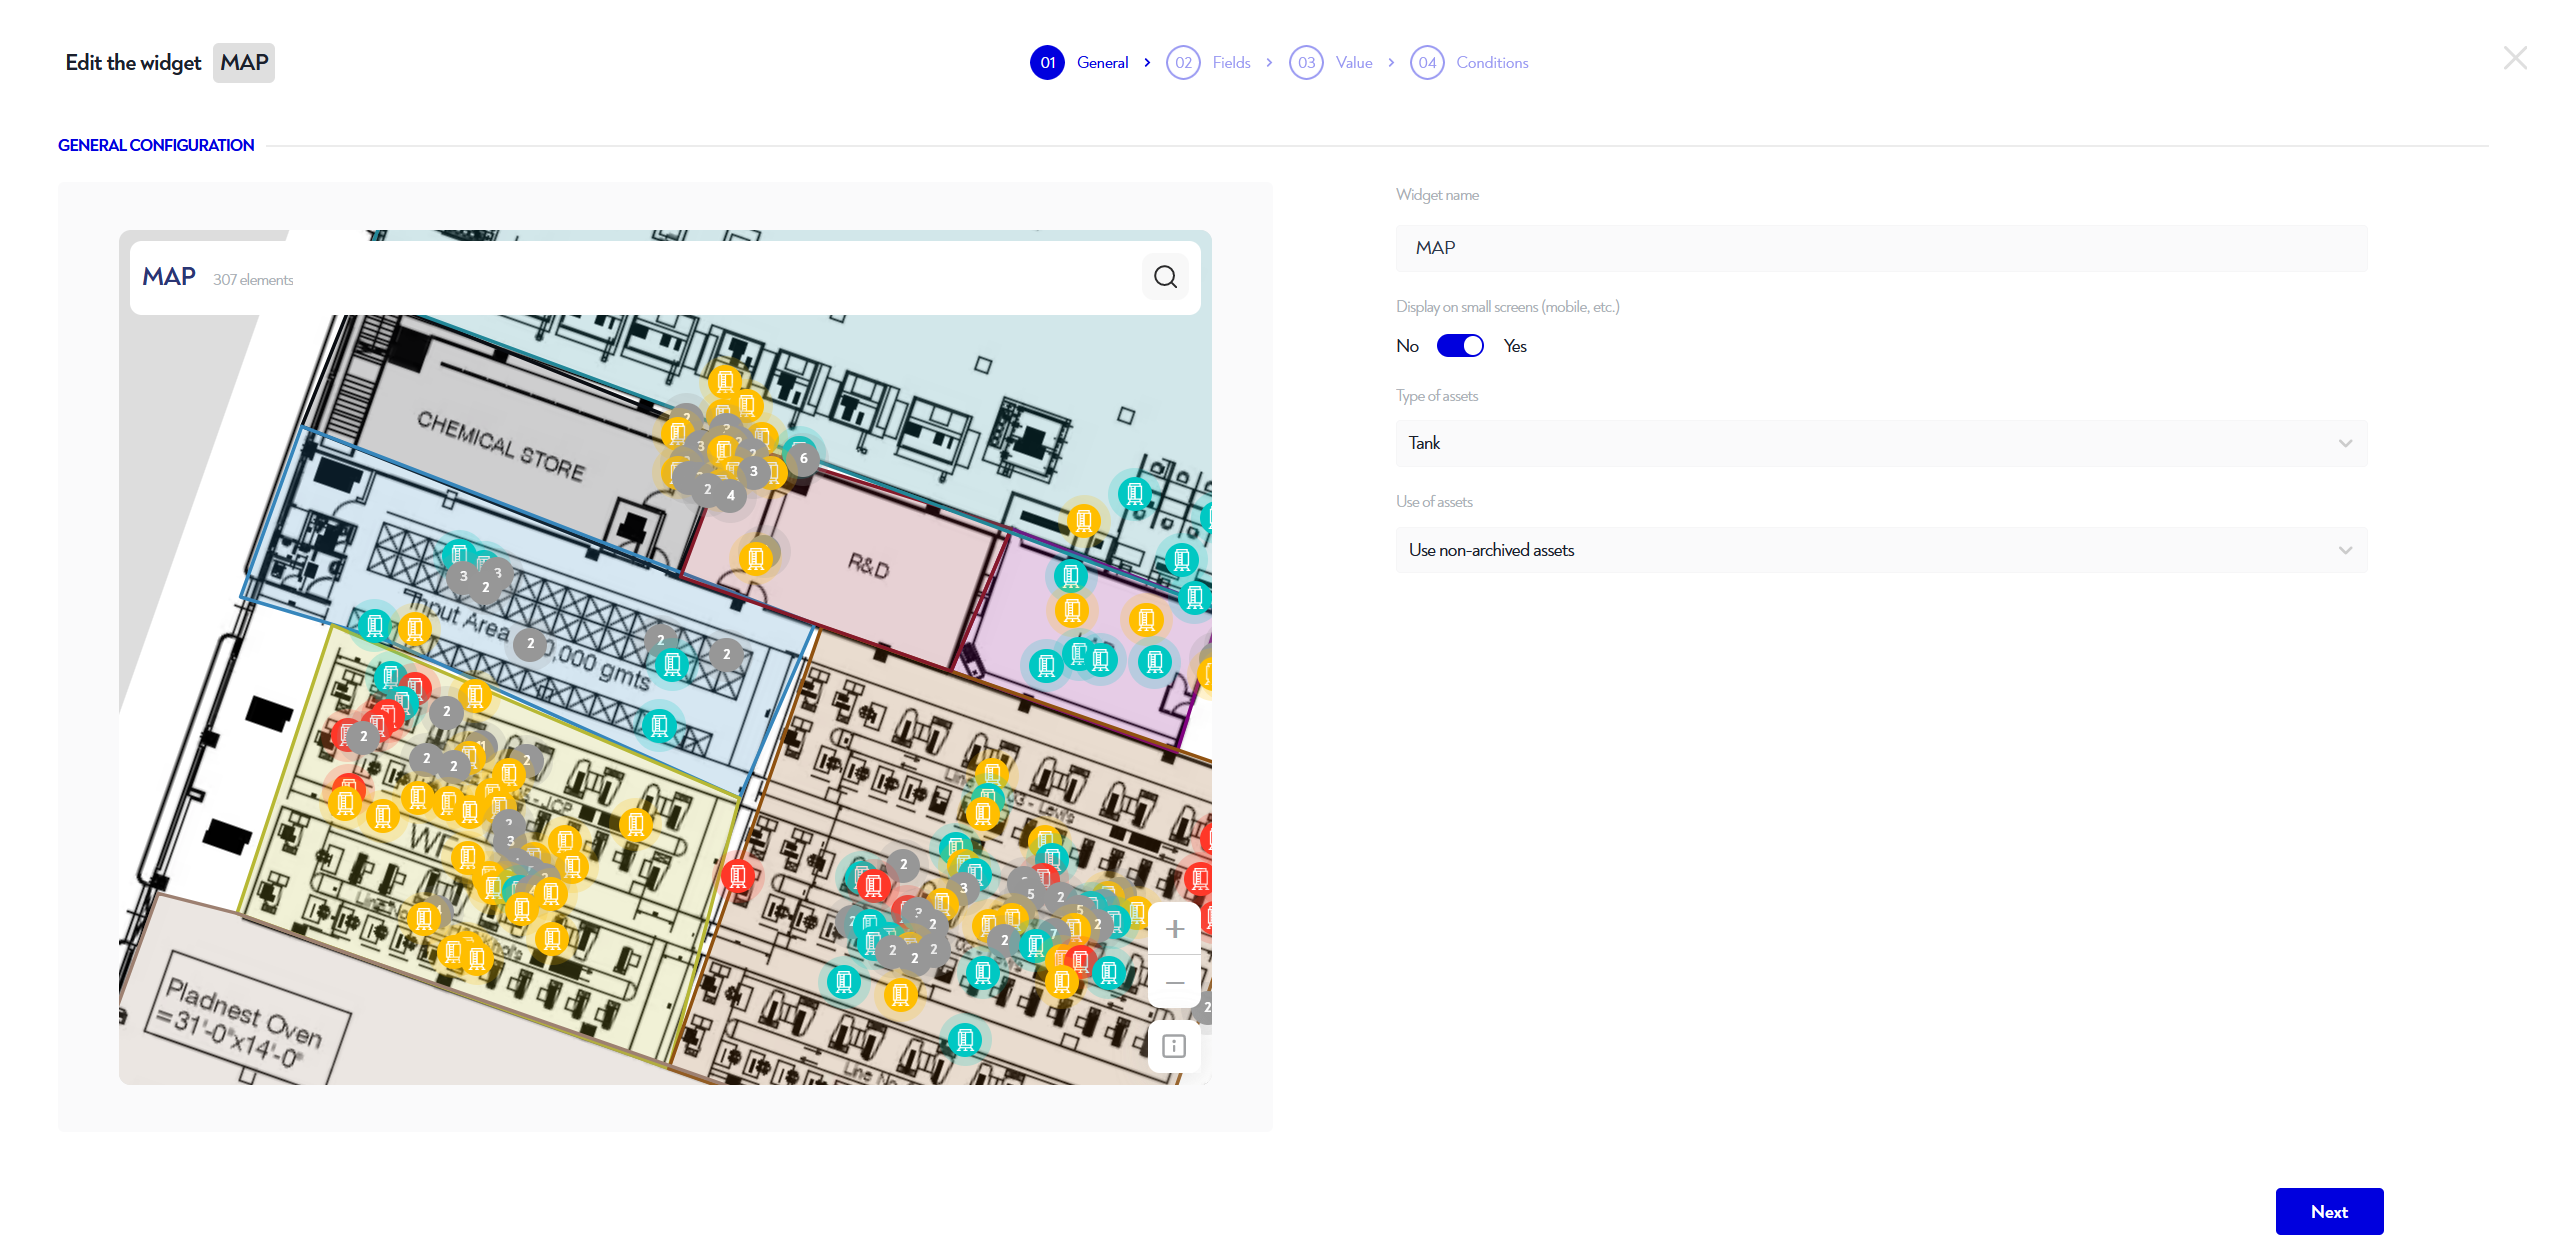
¶  General configuration
This step allows you to configure the basic elements of your widget:
 Set widget name
 Widget description (optional) : Adds a description to clarify the widget's use. This description will be displayed when hovering over the widget title.
 The asset type of the assets to be displayed
 To show or not to show archived assets
 In advanced options: show or hide widget on small screen (smartphone, etc.)
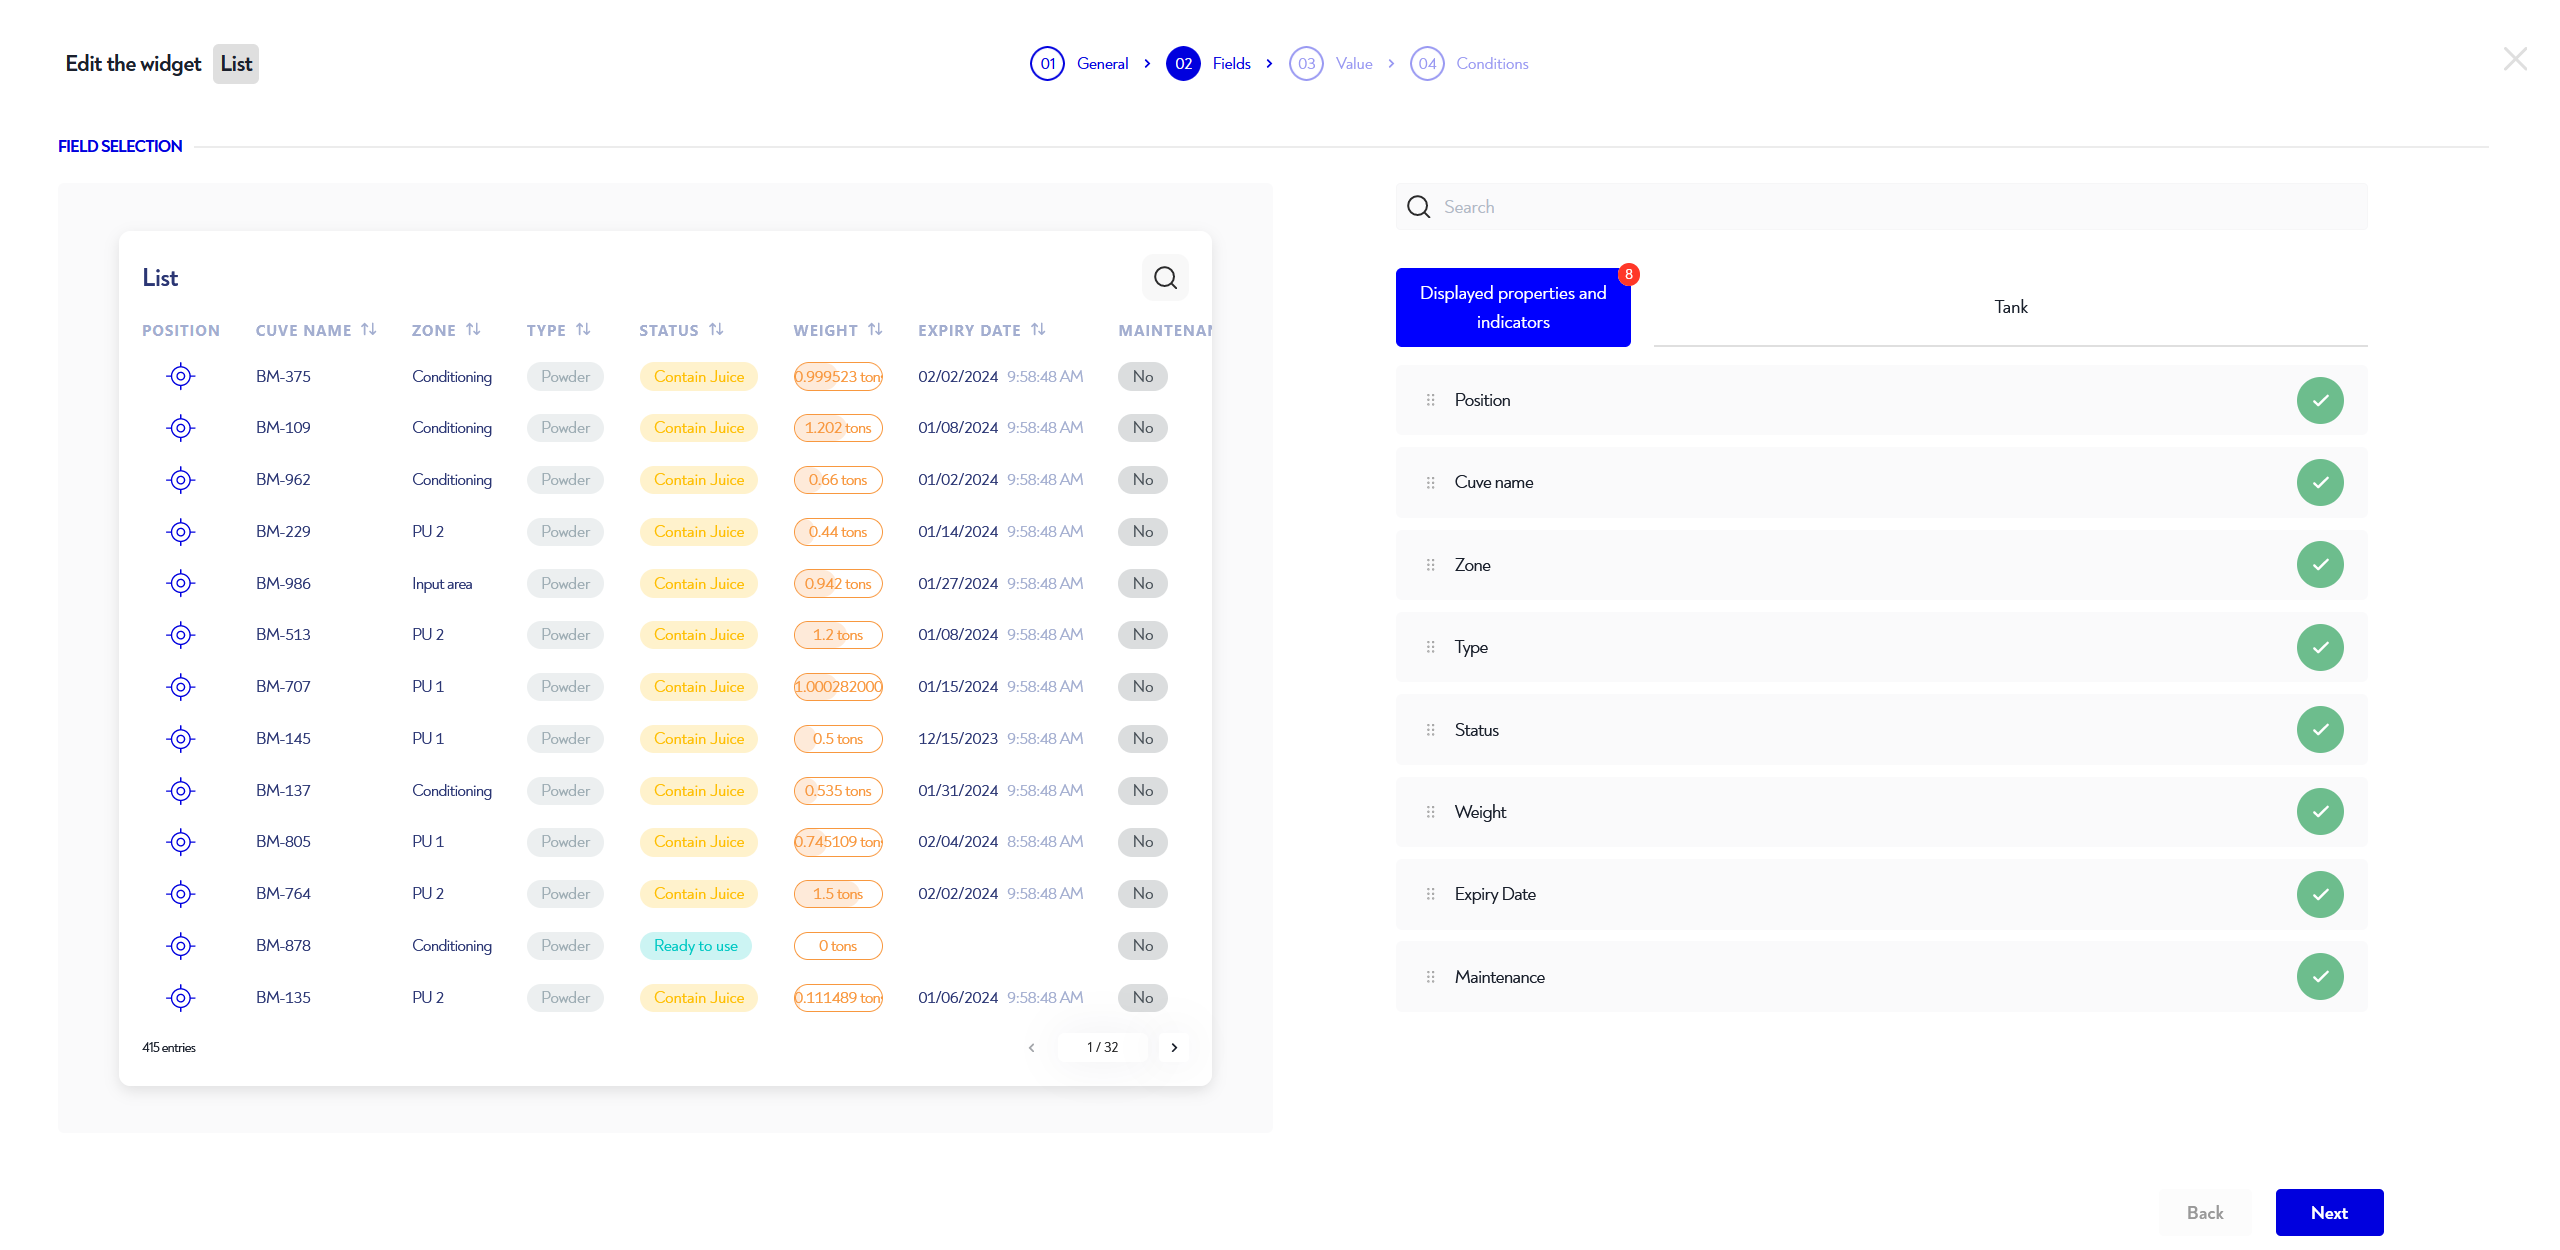
¶  Property selection
Step 2 lets you choose which properties to display.
For table and history widgets, these are the columns.
For the map, these are the properties displayed in the tooltip when you click on an asset. 
To add a property, click on the blue  to the right of the property.
To remove a property, click on the red  to the right of the property.
For the history widget, the properties asset name (ID) and date are mandatory and cannot be removed or reordered!
If you want to readjust the order of the properties you want to see, go to the tab "Properties and indicators displayed". You can then change the order of the properties using drag & drop .
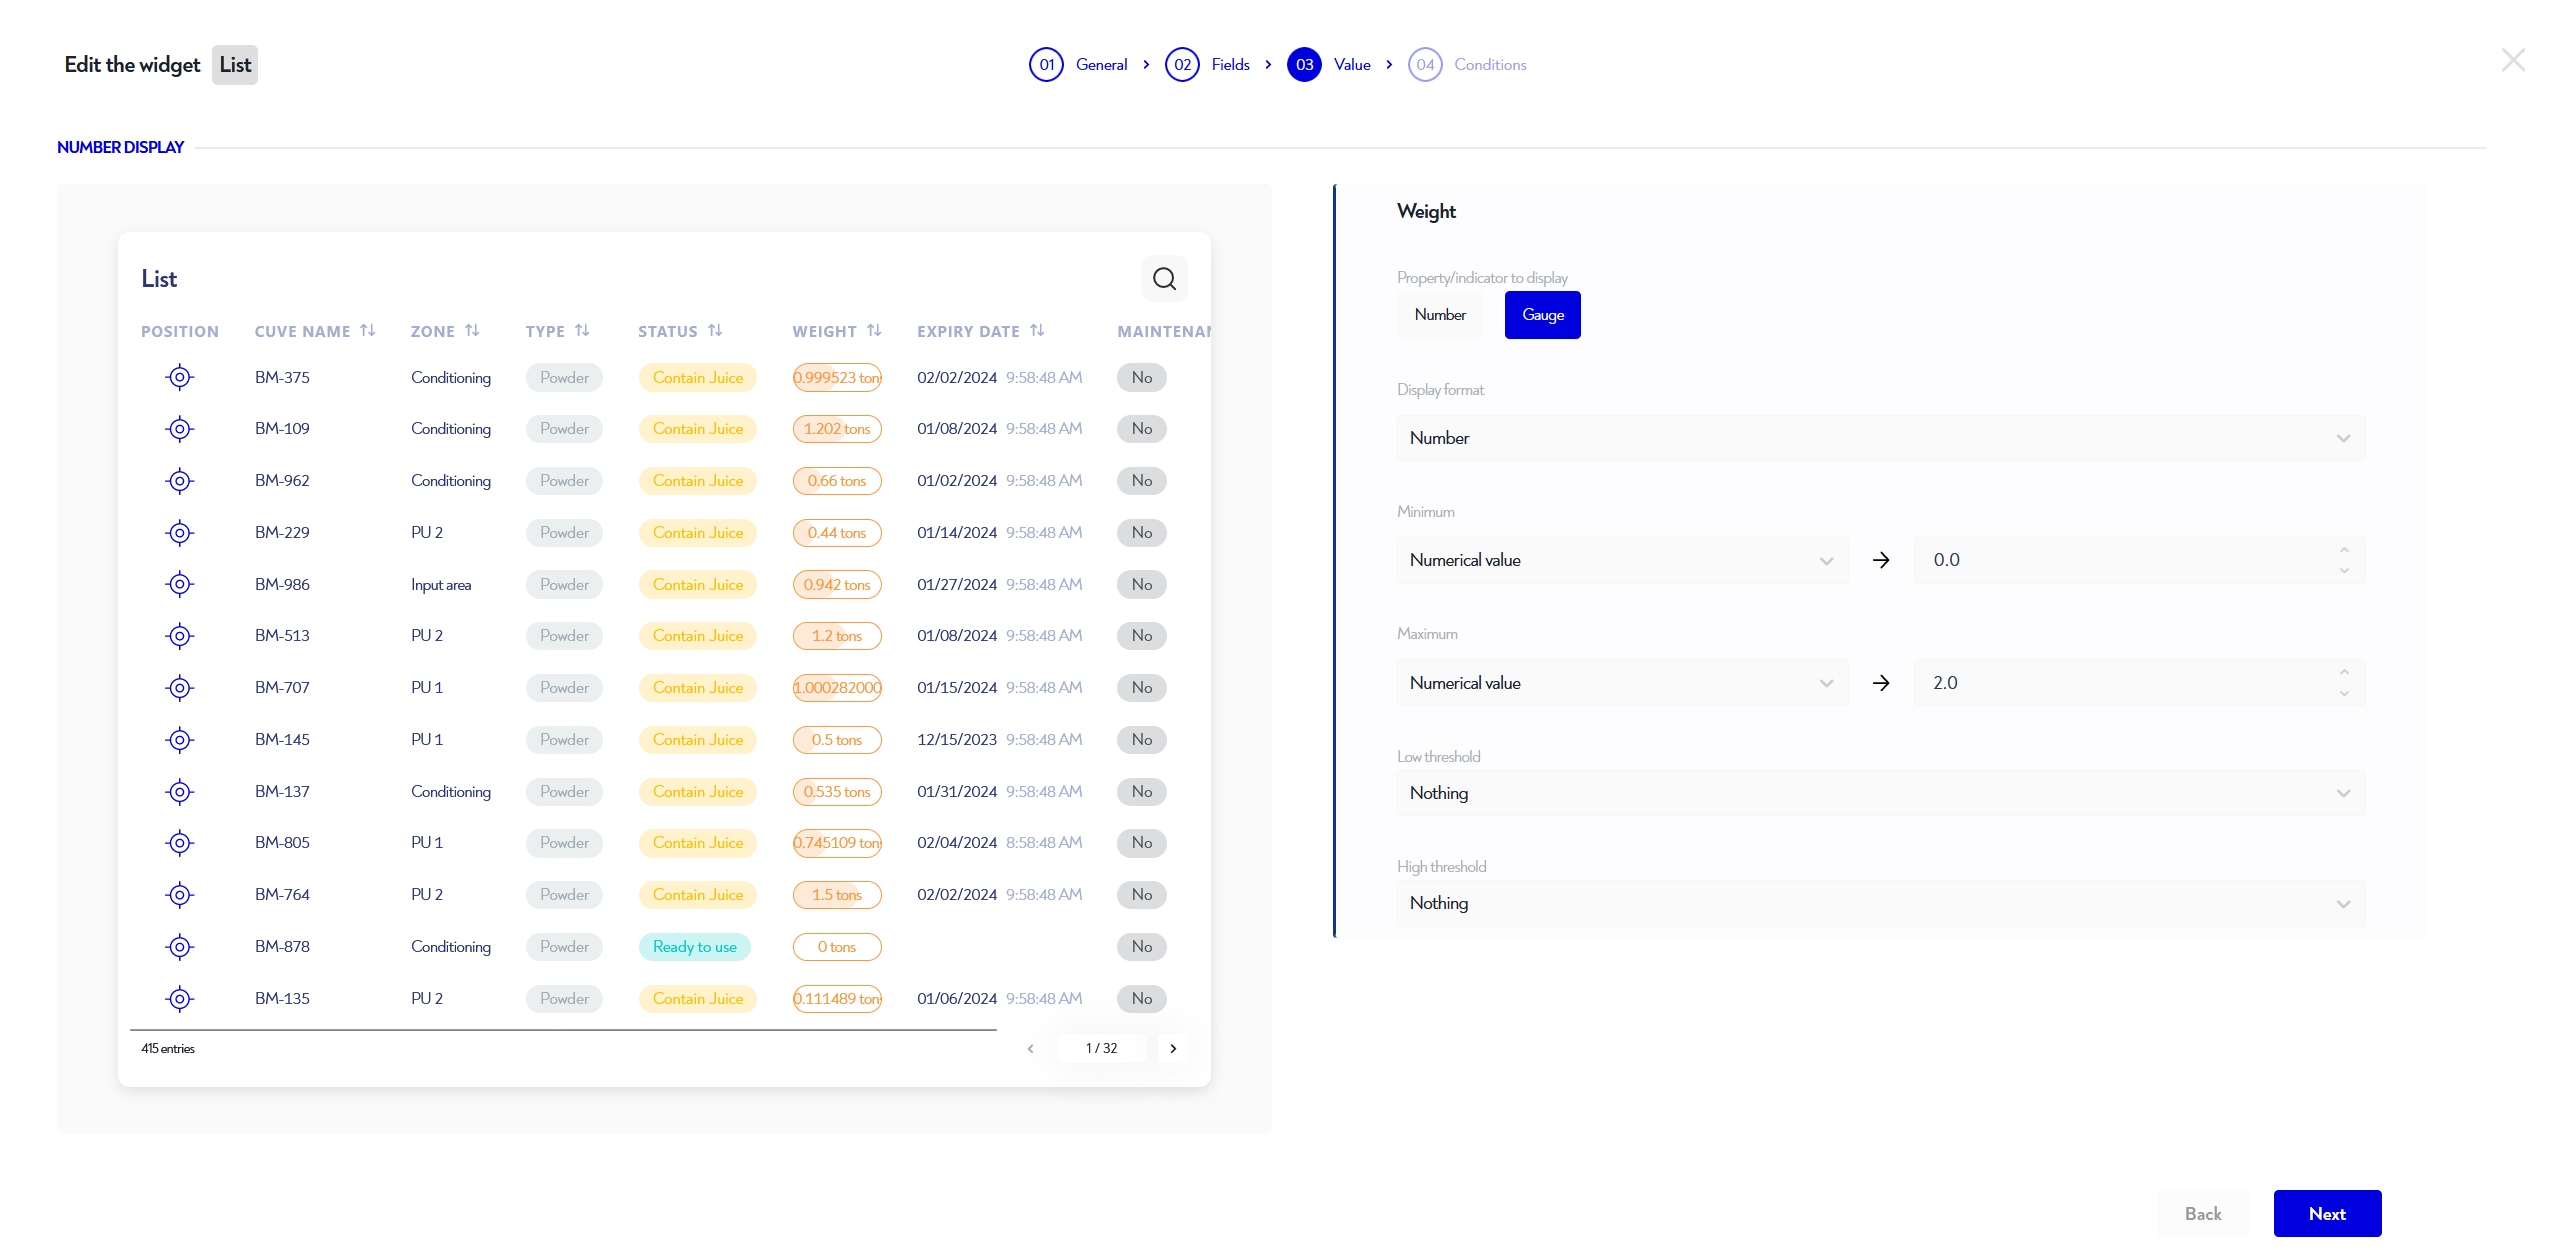
¶  Setting numerical properties
This step is optional: for a minimal configuration, you can simply go on to the next step!
If you chose to display one or more numerical properties in the previous step, you can now choose their display format. You have two options:
- Classic" digital display : value and its unit, if any.
- Display in "mini-gauge" format : allows you to set the value between two limits.
If you want a display in "mini-gauge" format, you need to set the following parameters:
- Display in number format (the value of the property) or percentage.
- Minimum and maximum thresholds, your choice :
- A fixed value.
- The value of another property.
- High and low thresholds (optional) :
- If you're above the high threshold, the mini-gauge changes color to the one defined.
- If you're below the low threshold, the mini-gauge changes color to that set.
¶  Adding conditions and other settings
This step is optional: for a minimal configuration, you can simply go on to the next step!
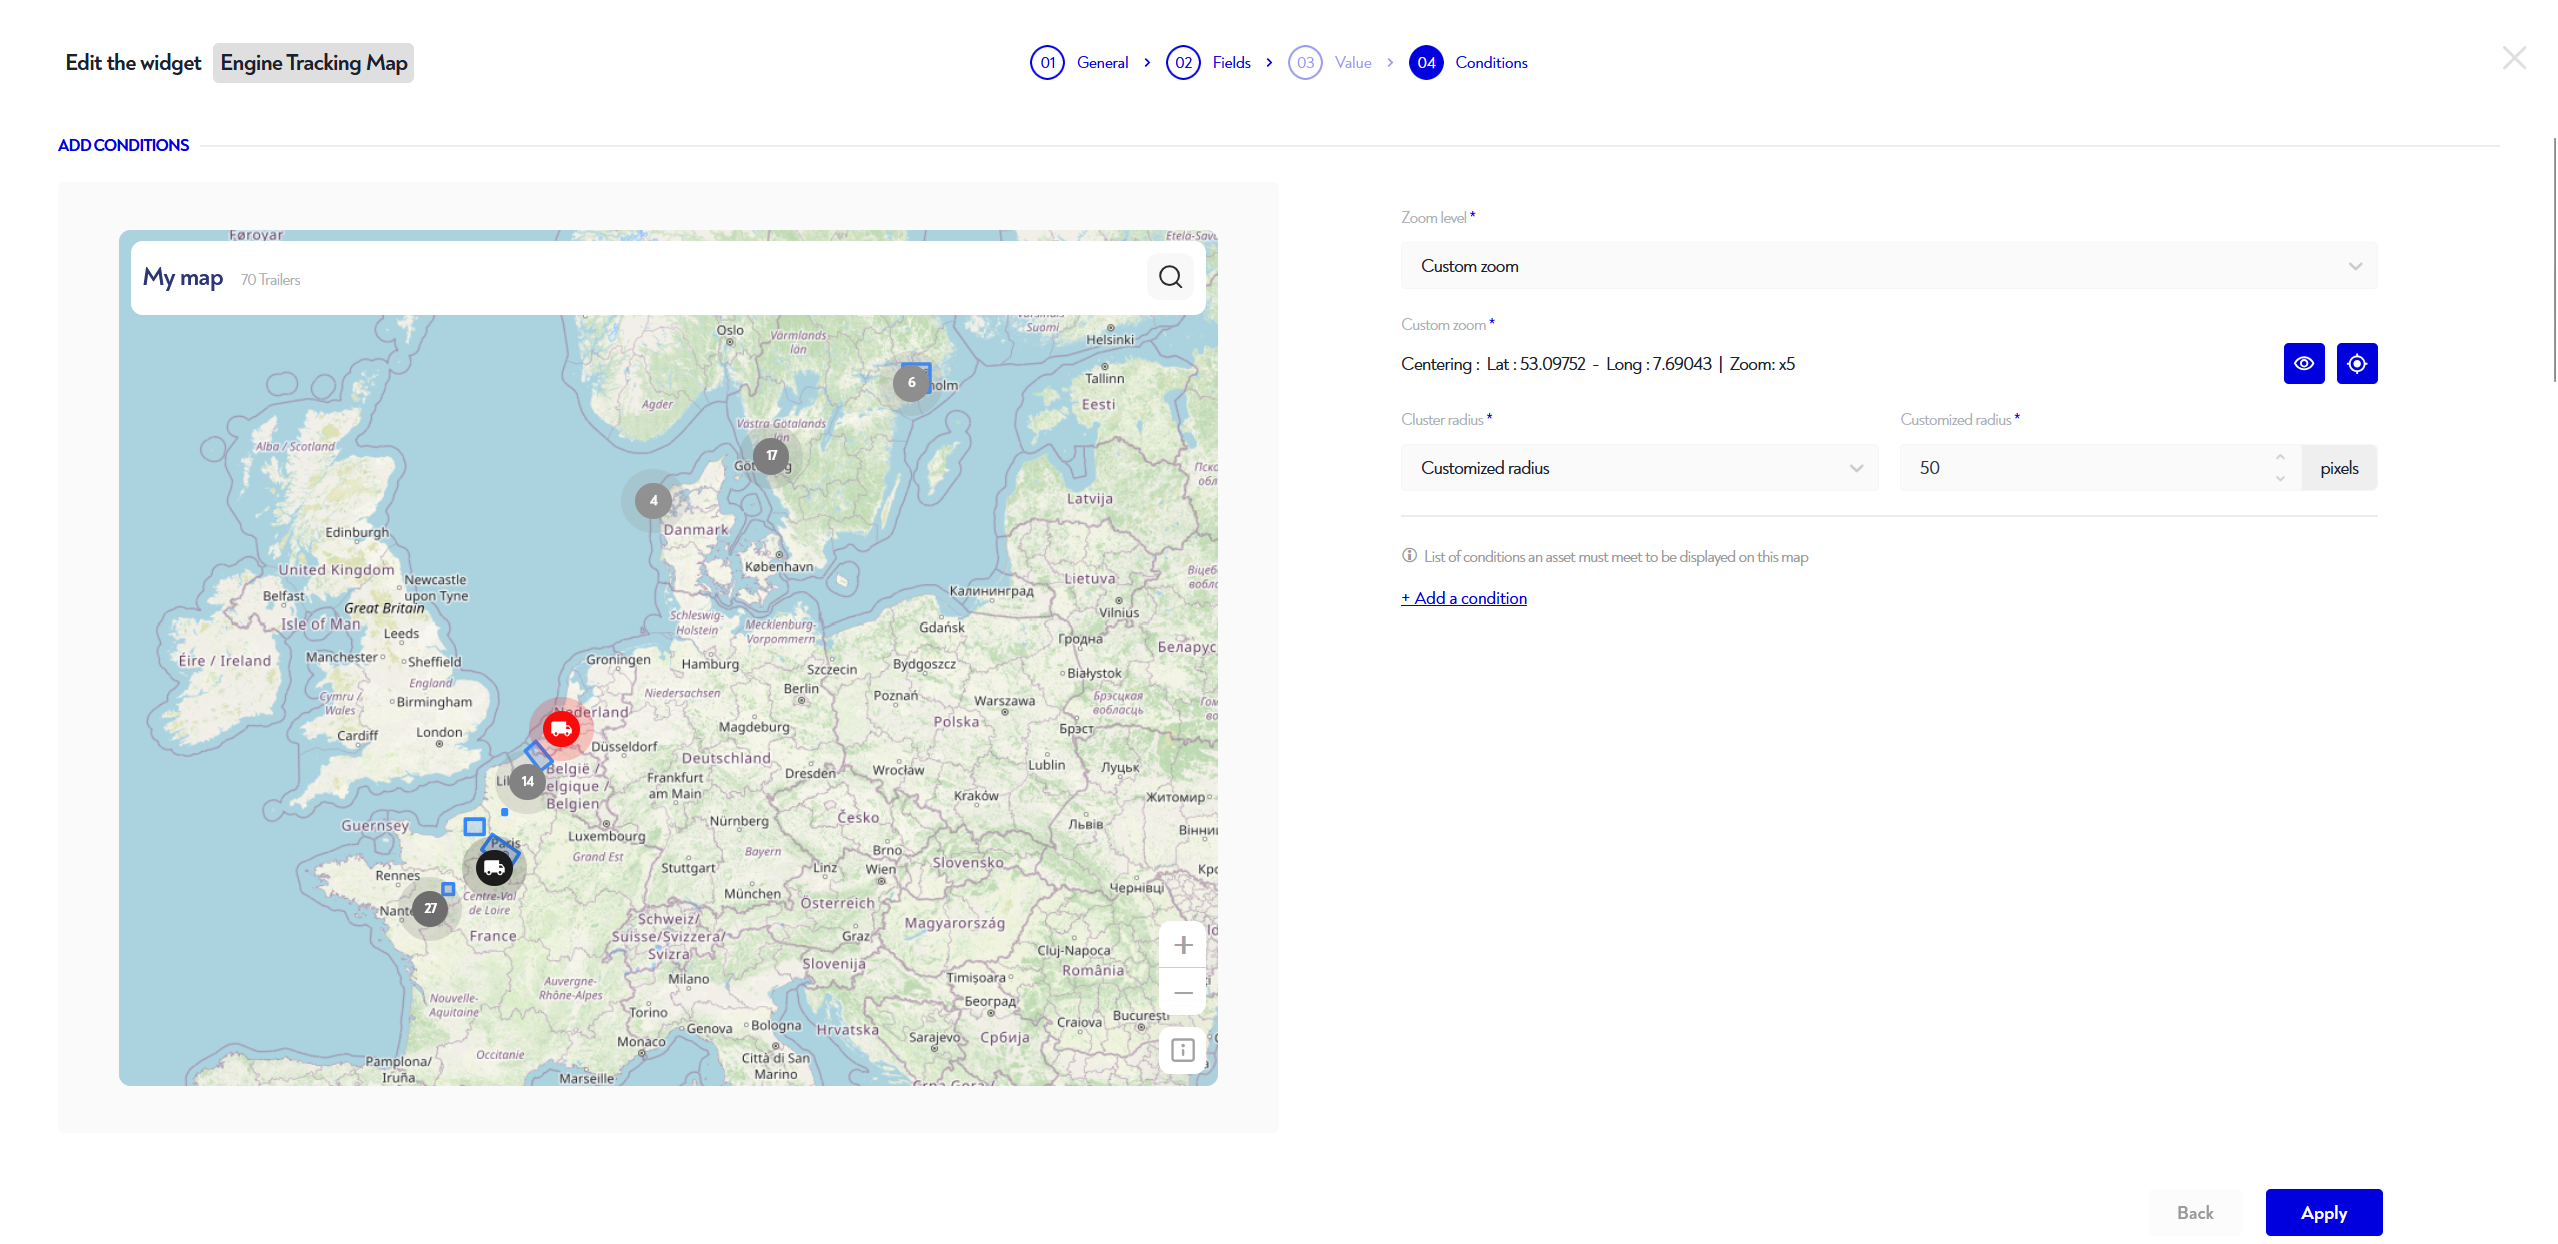
¶  Zoom settings (map widget only)
This configuration is only possible for versions of Robin 2025.2 and beyond.
The last step is to configure the zoom level .
To set the zoom level, select in the selector  among :
 Automatic zoom : automatically adjusts to show all assets on the map.
 Default site zoom : use the site configuration, set up by your admins on the IoT Hub (MAMS).
 Custom zoom : select the zoom level you want.
- In this case, a additional selector is displayed. Use the left-hand preview panel and adjust the zoom/centering as you like.
When you have finished, click on the target button to save it.
If you want to see the current configuration, click on theeye button .
.
- In this case, a additional selector is displayed. Use the left-hand preview panel
You can also define the cluster size (asset grouping) to lighten your map view. You can choose between :
- Site default radius : use the site configuration, set up by your admins on the IoT Hub (MAMS).
- Customized radius : in this case, select in the numeric input field the size you want in pixels. Preview updates in real time
 so you can see the impact of your changes.
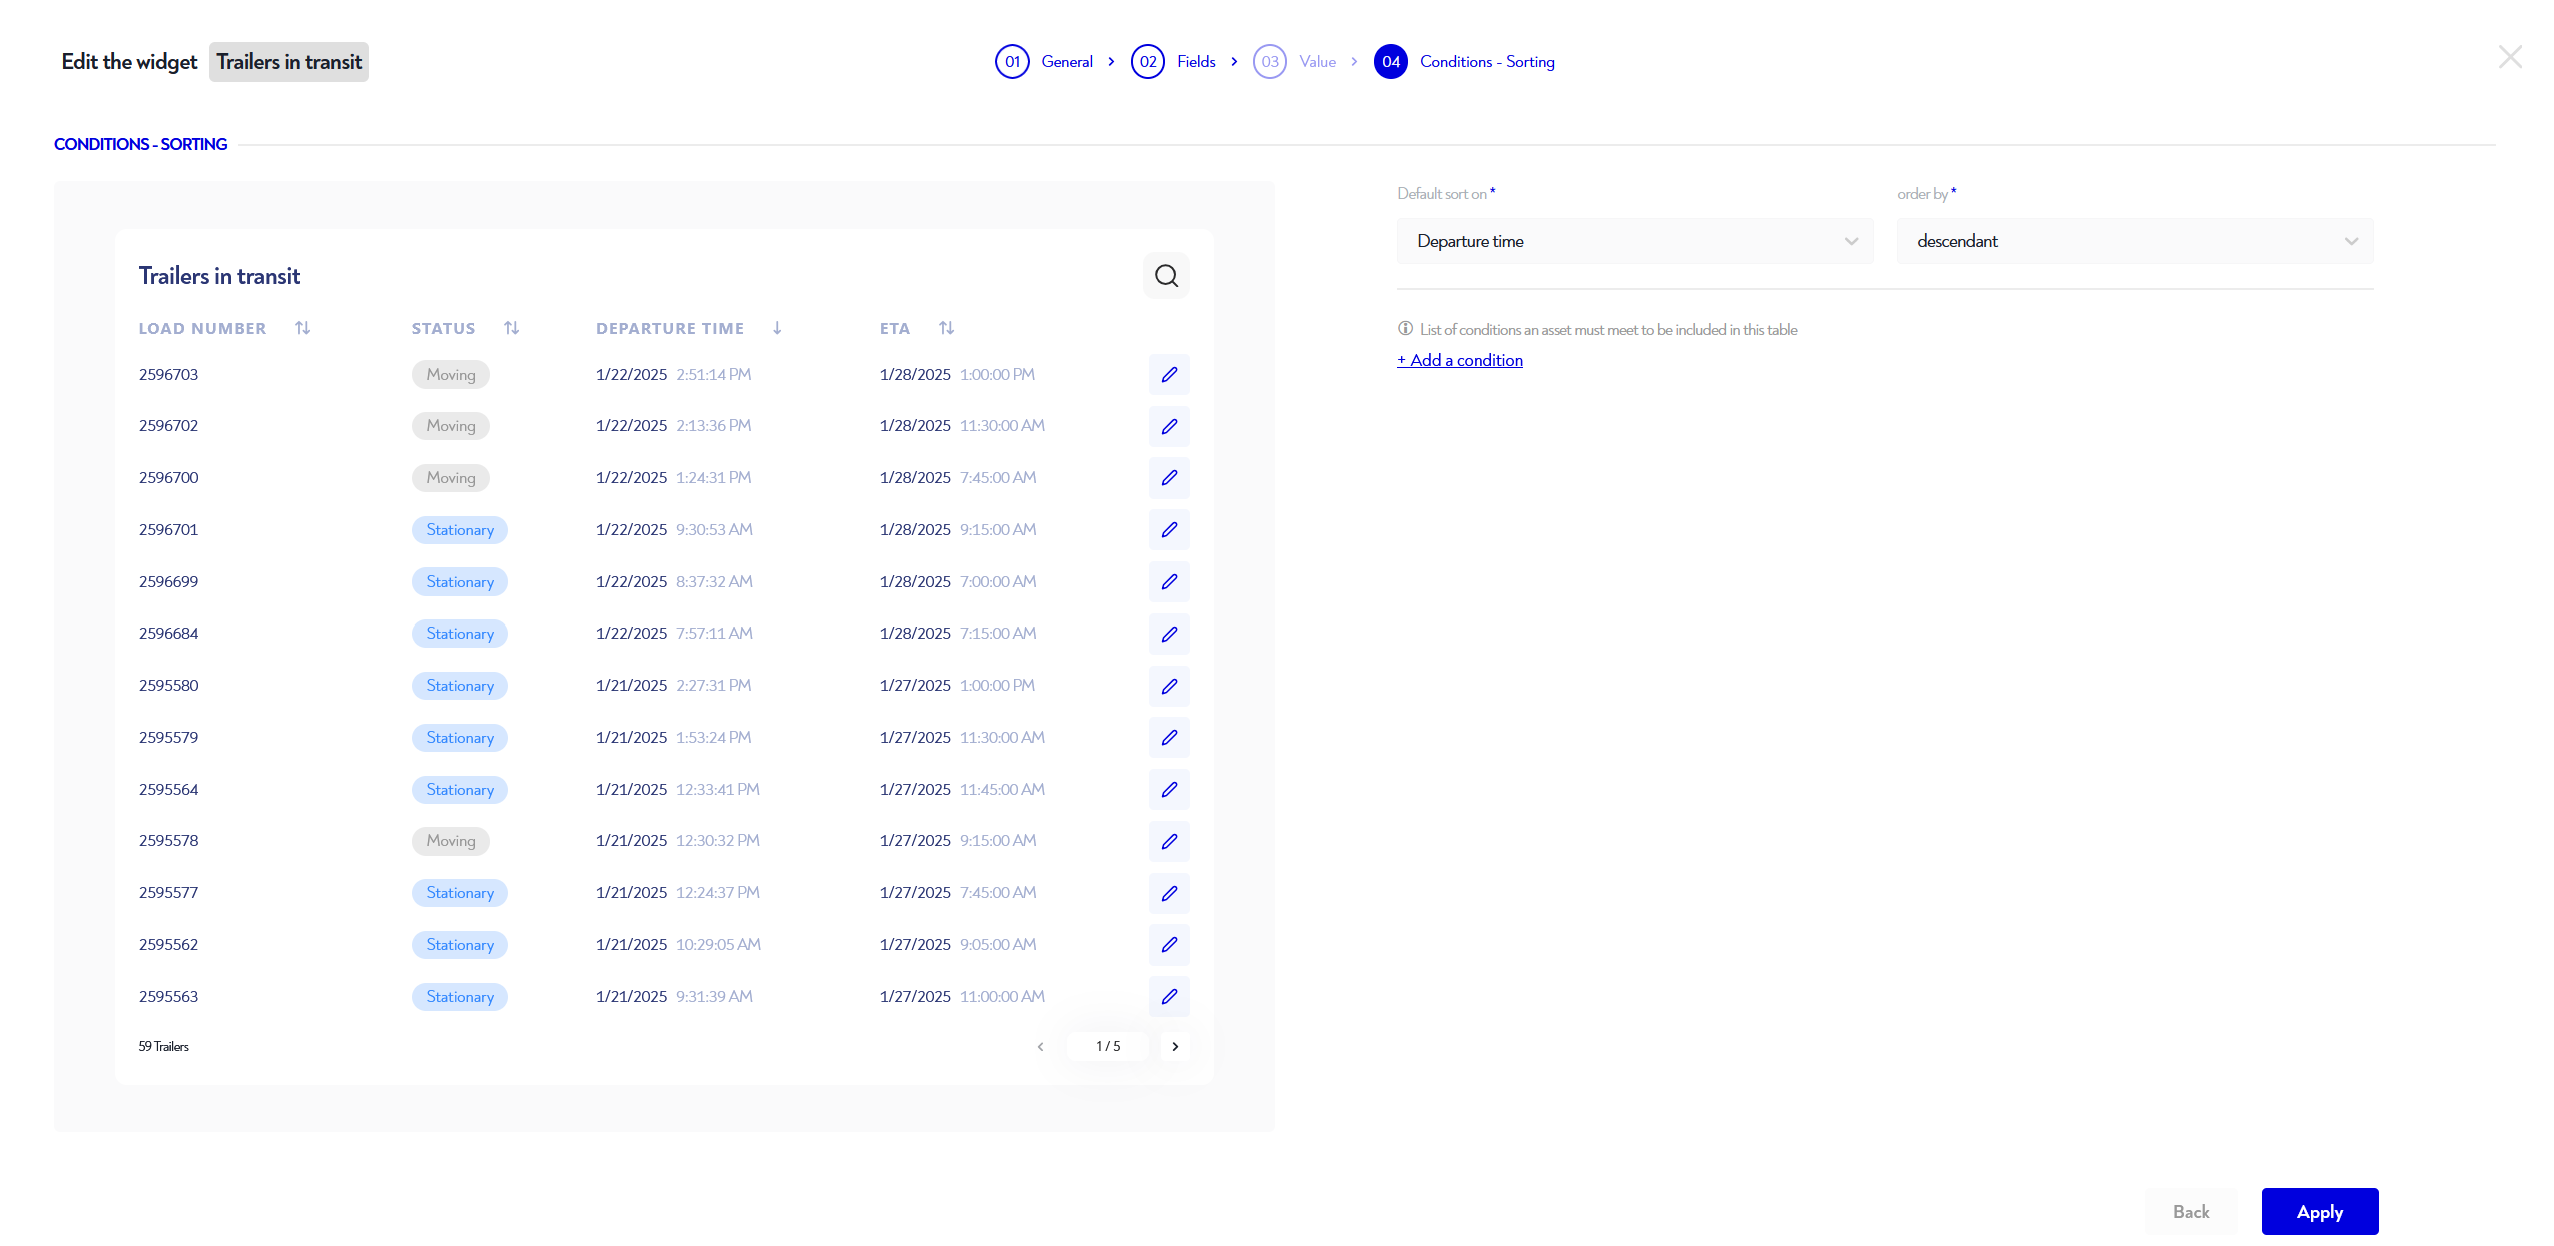
¶  Default sort configuration (table widget only)
This configuration is only possible for versions of Robin 2025.2 and beyond.
The last step allows, for widgets tables, to define on which column sort the table by default.
- Choose on the selector "sort by default on" the column on which you wish to sort your table by default.
- In the next selector, choose if you want the sorting to be in order ascendant
 or descendant .
This option is particularly useful for, for example :
- Sort your stocks by increasing expiry date
 .
. - Sort your production orders by order of priority
 .
.
¶ Add conditions
This step also allows you to add conditions to limit the number of assets to be displayed on the widget according to the criteria of your choice.
For example, if you want to see only the assets in a certain zone, you can do so by clicking on "Add a condition" and selecting the property or indicator you wish to filter (eg: "zone"  ), then selecting the operation "=" and the desired value (e.g.: the zone "Conditioning" on the image below).
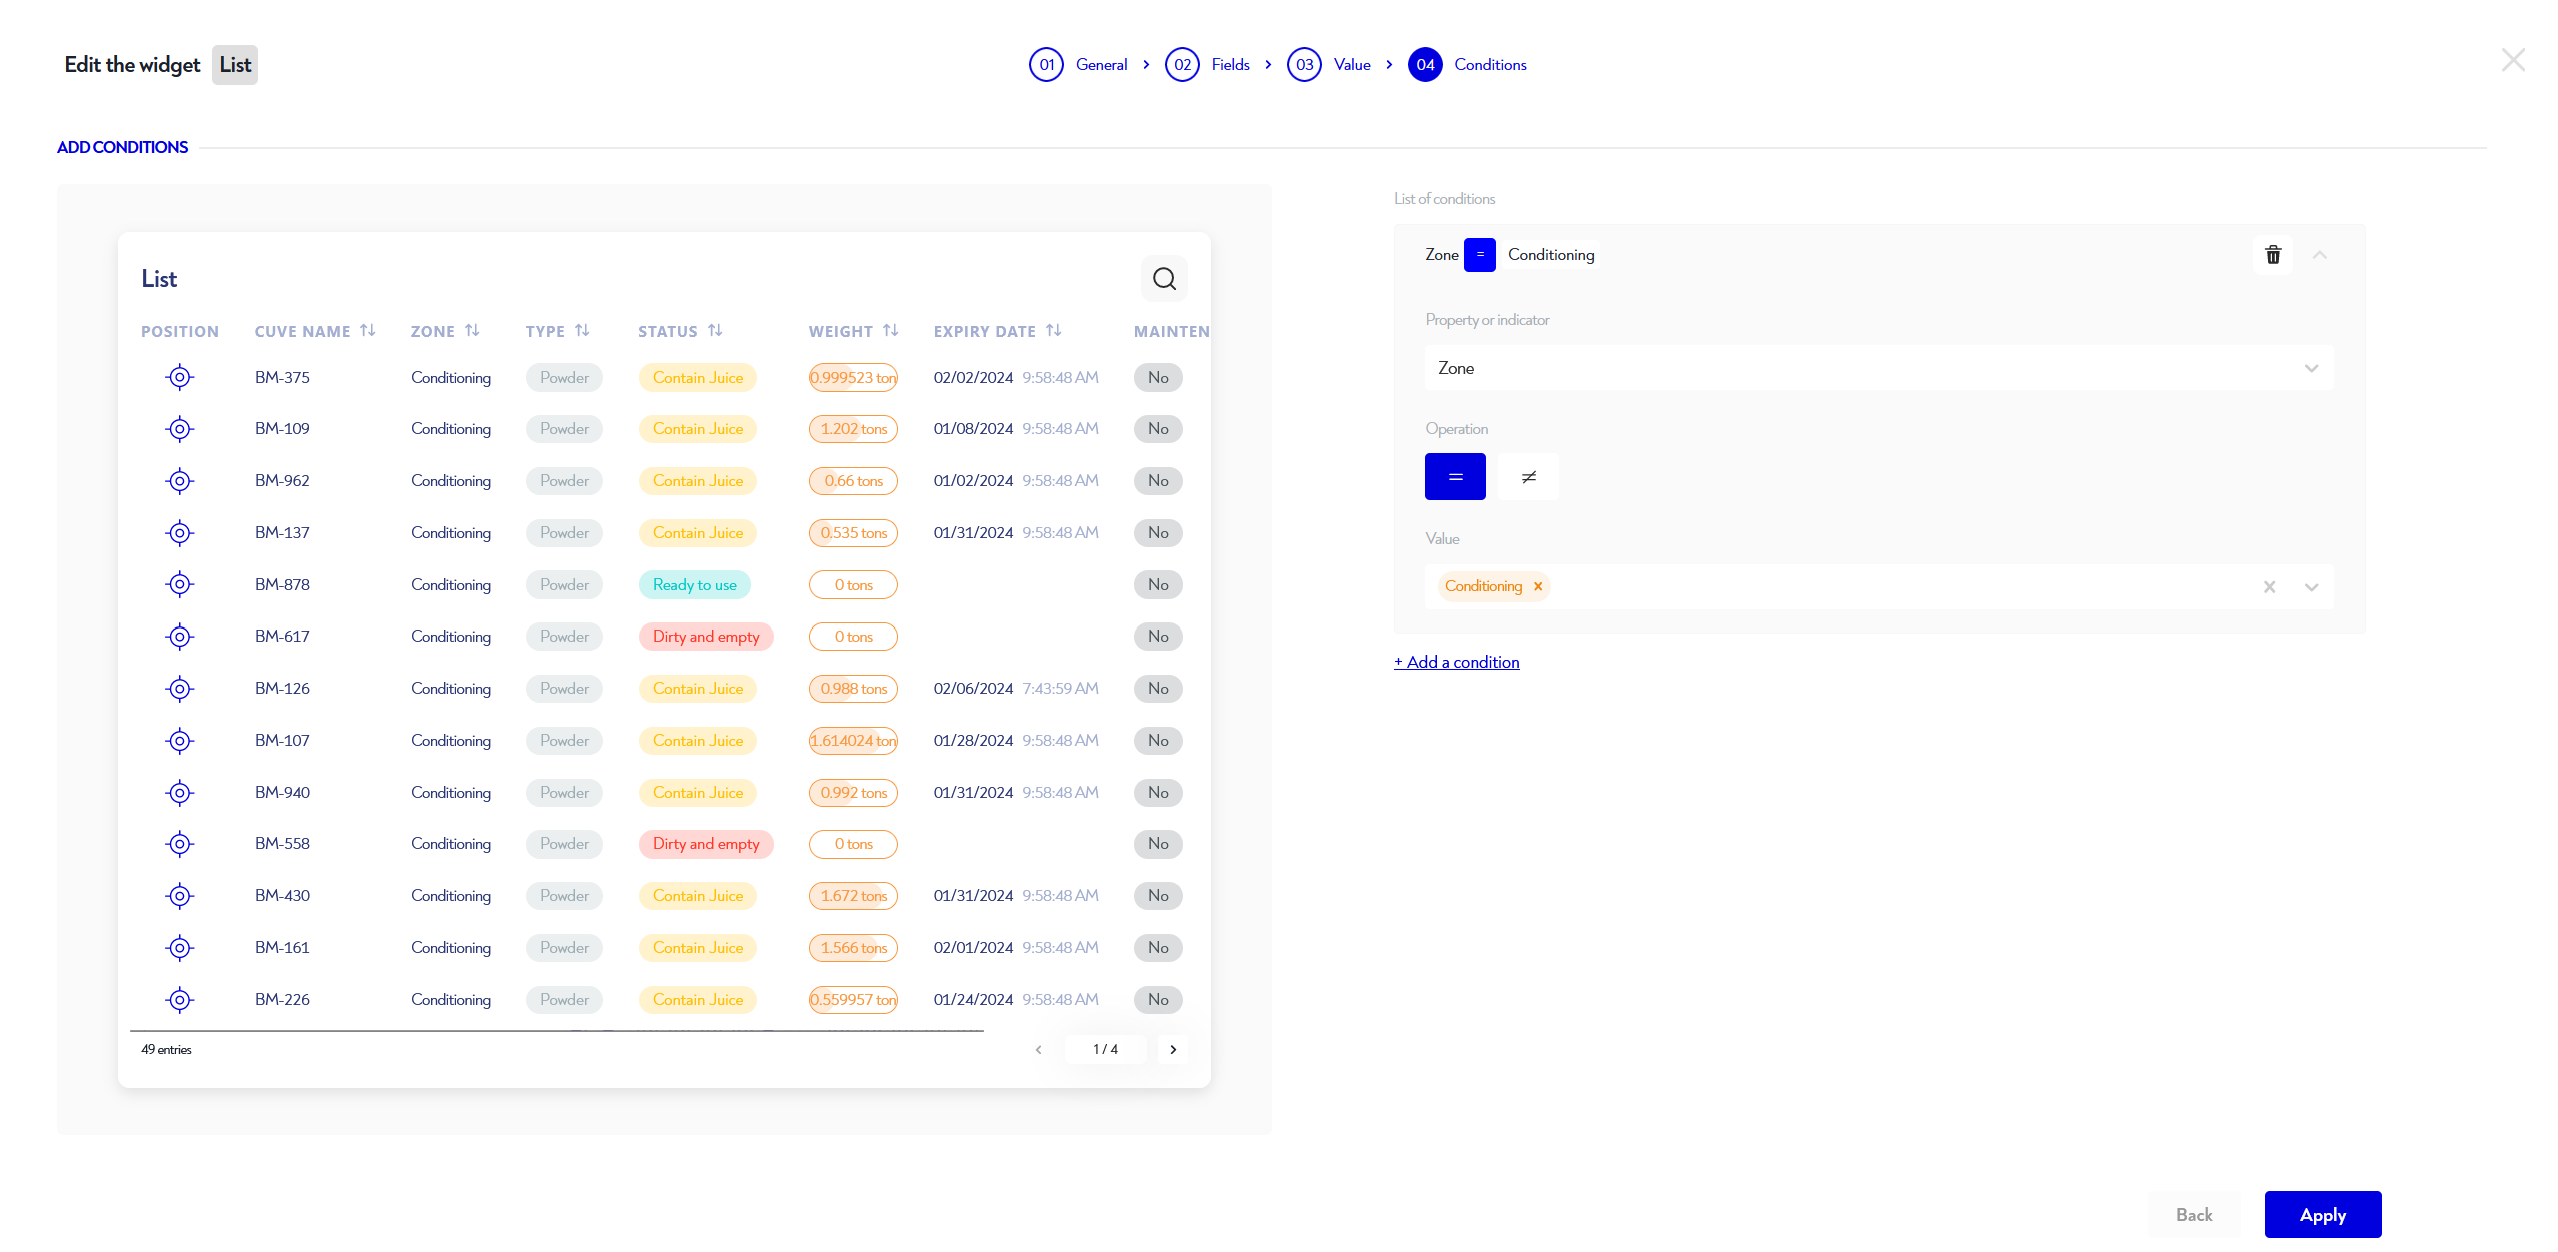
To delete a condition, click on it, then on the trash icon  .
.
If you wish to display all assets on the  map, simply ignore the "Add a condition", just click on "Add".
Is this page unclear or do you need help?
Don't hesitate to contact us at support@zozio.tech !