This configuration is only available for Robin versions higher than 2024-5
¶ Go to the alert management page
This advanced configuration is only available on
and is not currently available on
smartphones!
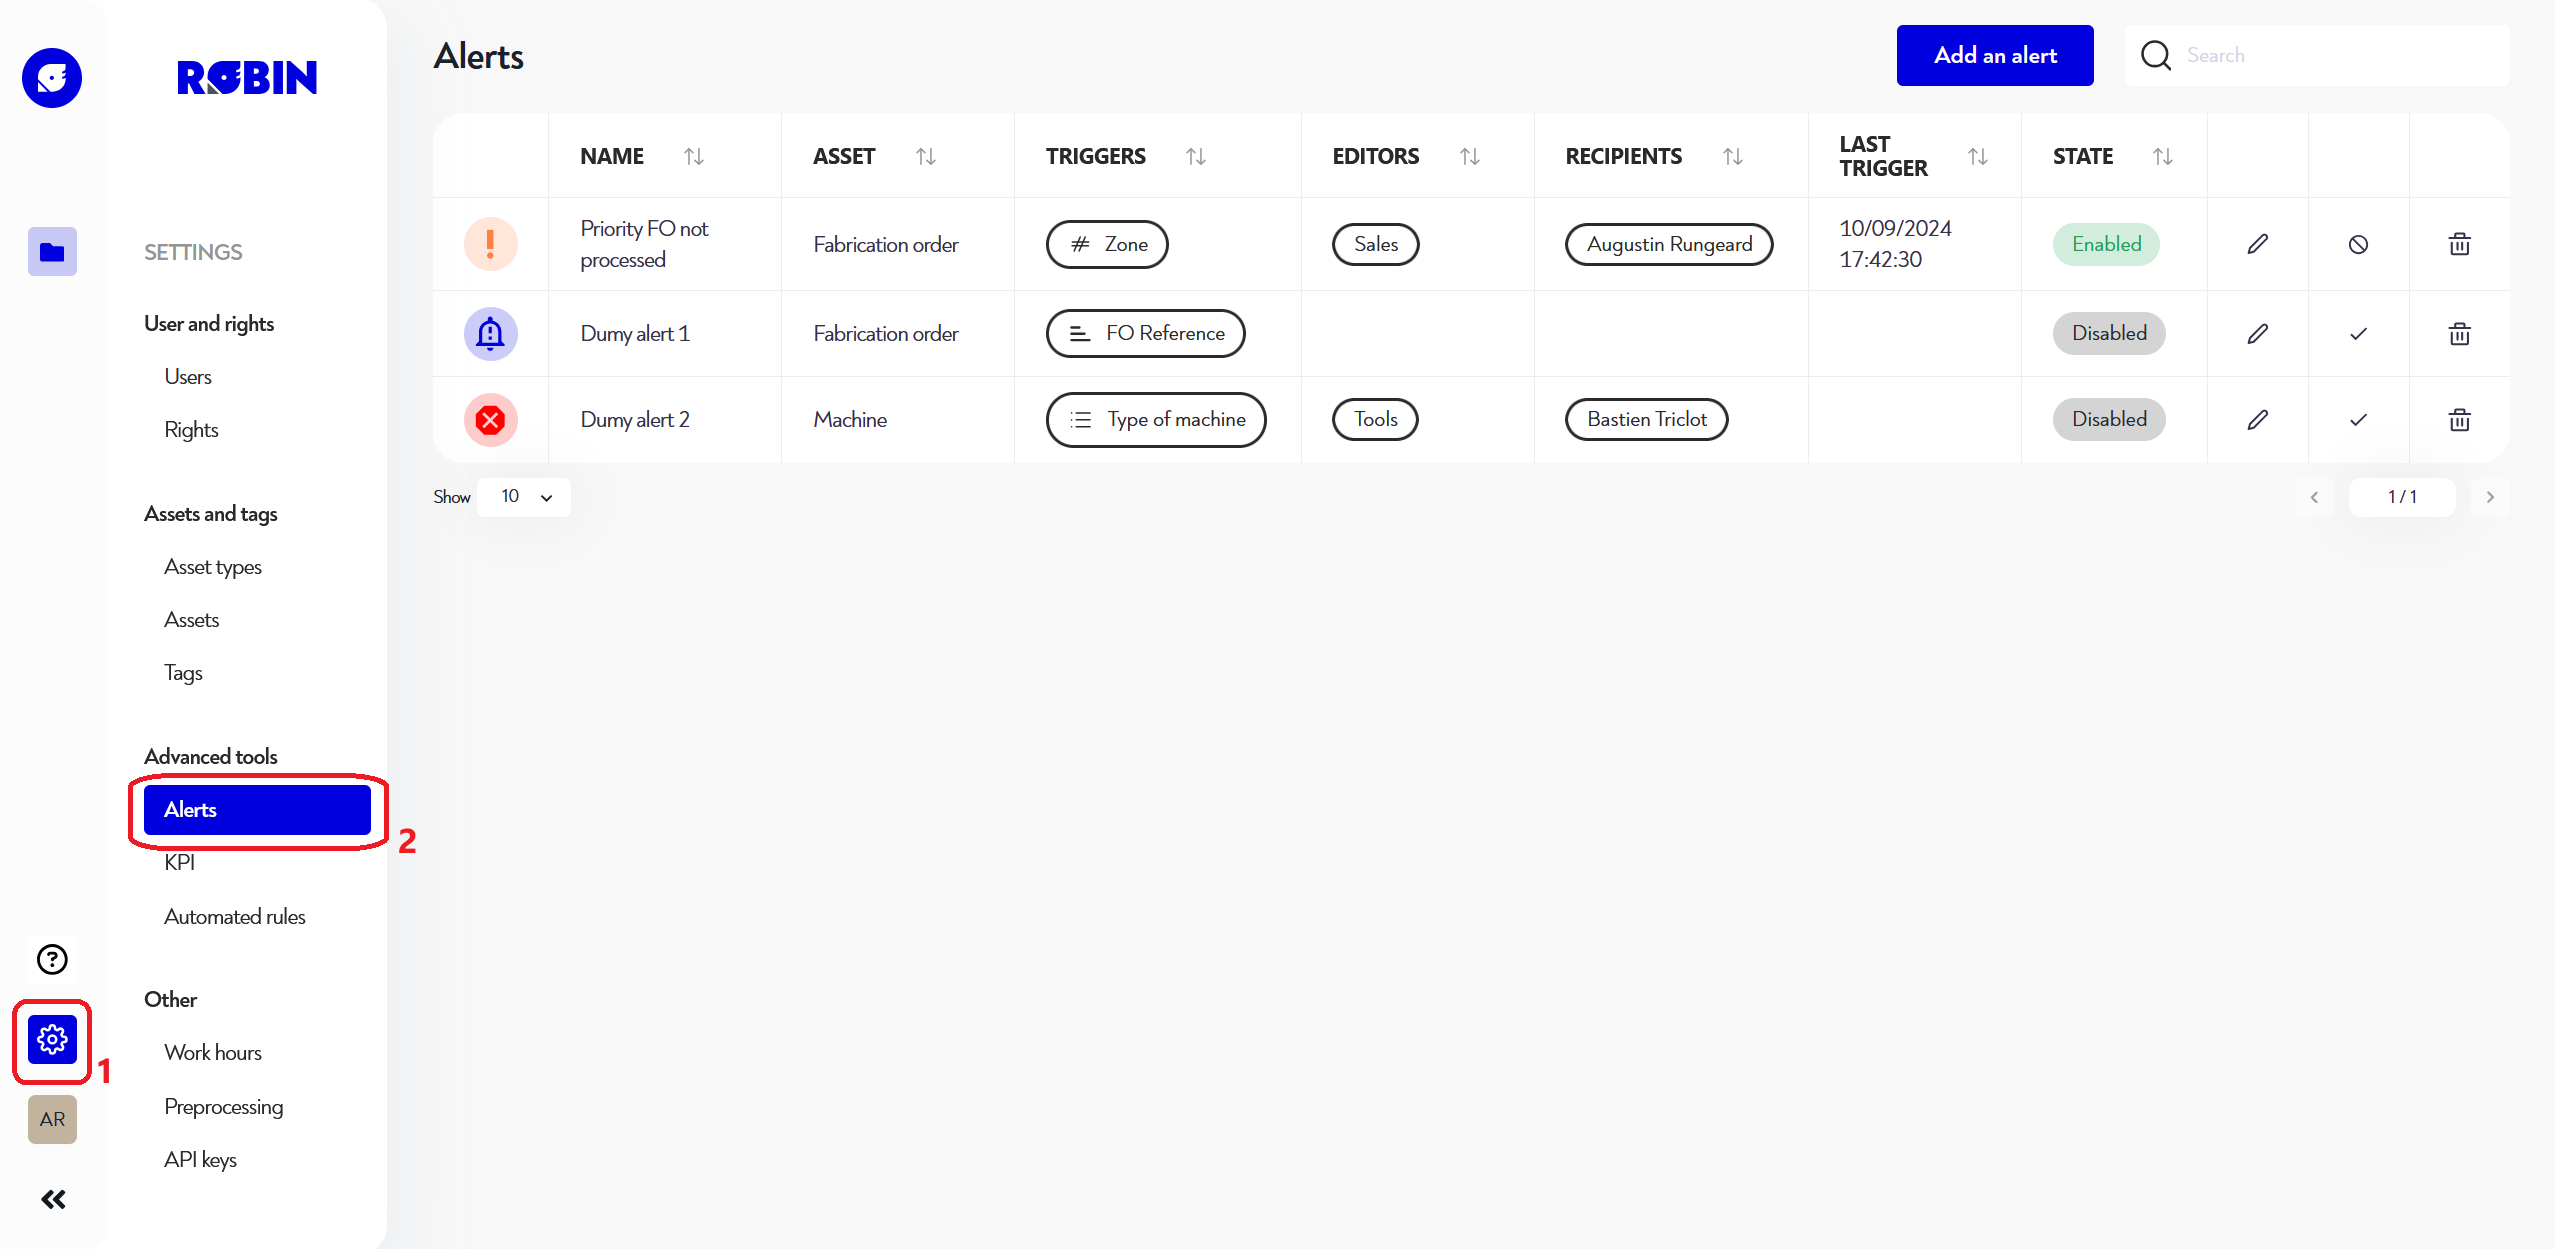
To access the alerts management page, click on the gear-shaped button at the bottom left of the navigation bar, then on "Alerts" in the "Advanced tools" section, as shown below:
¶ Add or edit an alert
To add an alert, click on the blue "Add alert" button at the top right of the page. To edit an alert, click on the pencil icon to the far right of the alert line you wish to edit. In both cases, you'll be presented with a pop-up with the following steps to complete.
¶ Step 1: General configuration
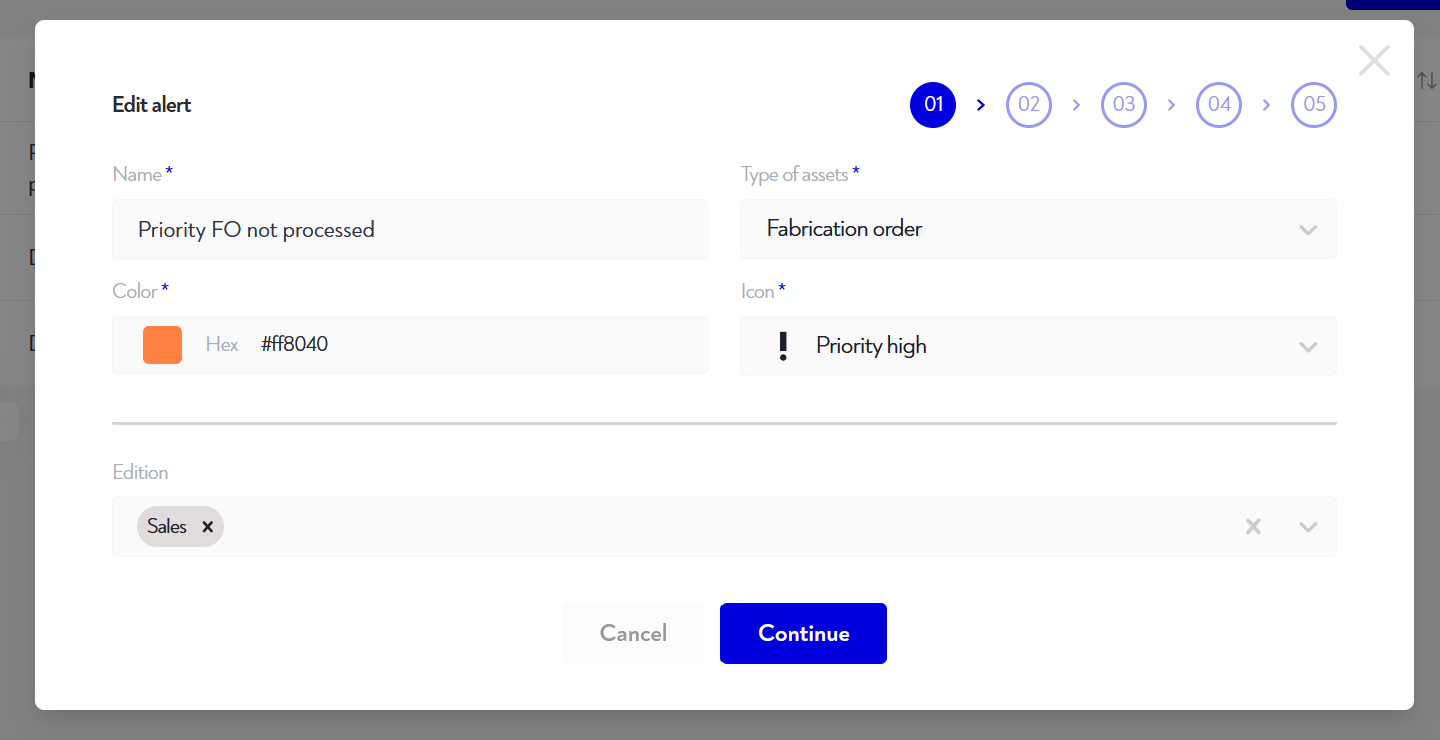
In this step, you must fill in the following information:
- alert name. This is the name that will appear in the title of the notification and in the subject line of the alert e-mail
- the type of asset on which to configure the alert
- alert color
- the alert icon
- the rights groups that can edit this alert. If you don't select any, only you can edit this alert.
When you have finished this step, click on the blue "continue" button
¶ Step 2: Conditions for triggering the alert
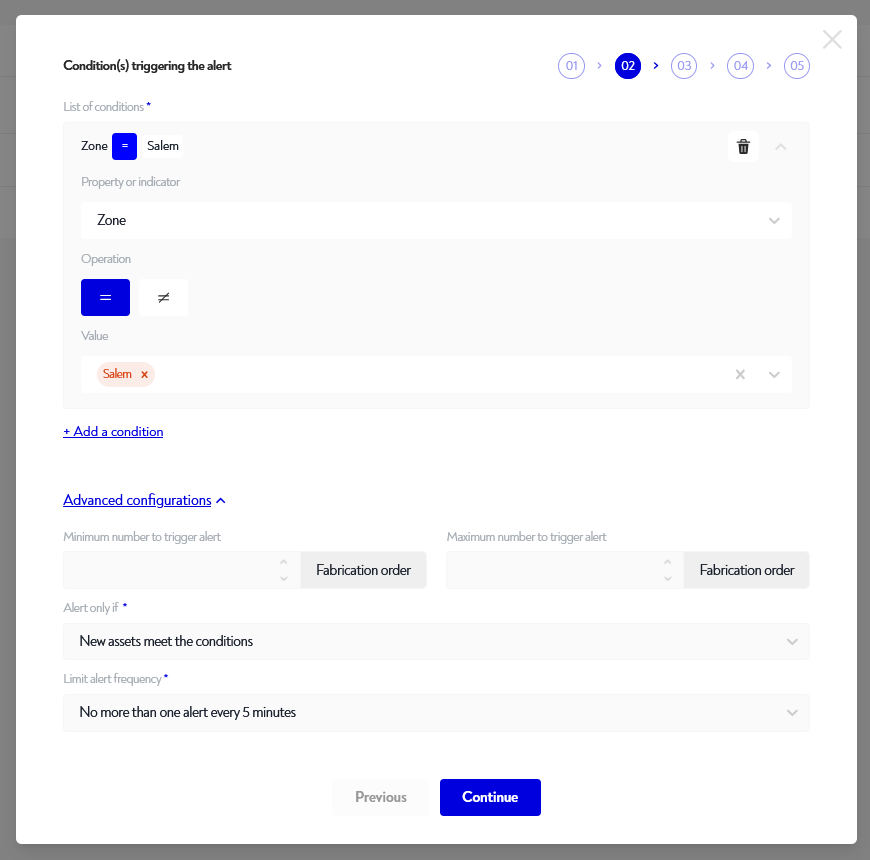
At this stage, you can configure as many conditions as you like to trigger the alert. In other words, as soon as one or more assets meet these conditions, an email or notification will be sent.
For example, if you want to trigger an alert as soon as an asset enters a certain zone, you can do so by clicking on "Add a condition" and selecting the property or indicator you wish to filter, in this case "zone", and selecting the "=" operation in this case, then selecting the desired value (for example the "Salem" zone in the image below).
You can also configure certain expert options in the "Advanced settings" drop-down menu:
- Minimum number of assets to trigger alert: no alert will be issued if there are fewer assets than configured meeting the conditions configured above.
- Maximum number of assets to trigger alert: no alert will be issued if there are more assets than configured to meet the conditions set above.
- Alert only if :
- New assets meet the conditions
- Some new assets meet the conditions, or others no longer do so
When you have finished this step, click on the blue "continue" button
¶ Step 3: Alert description
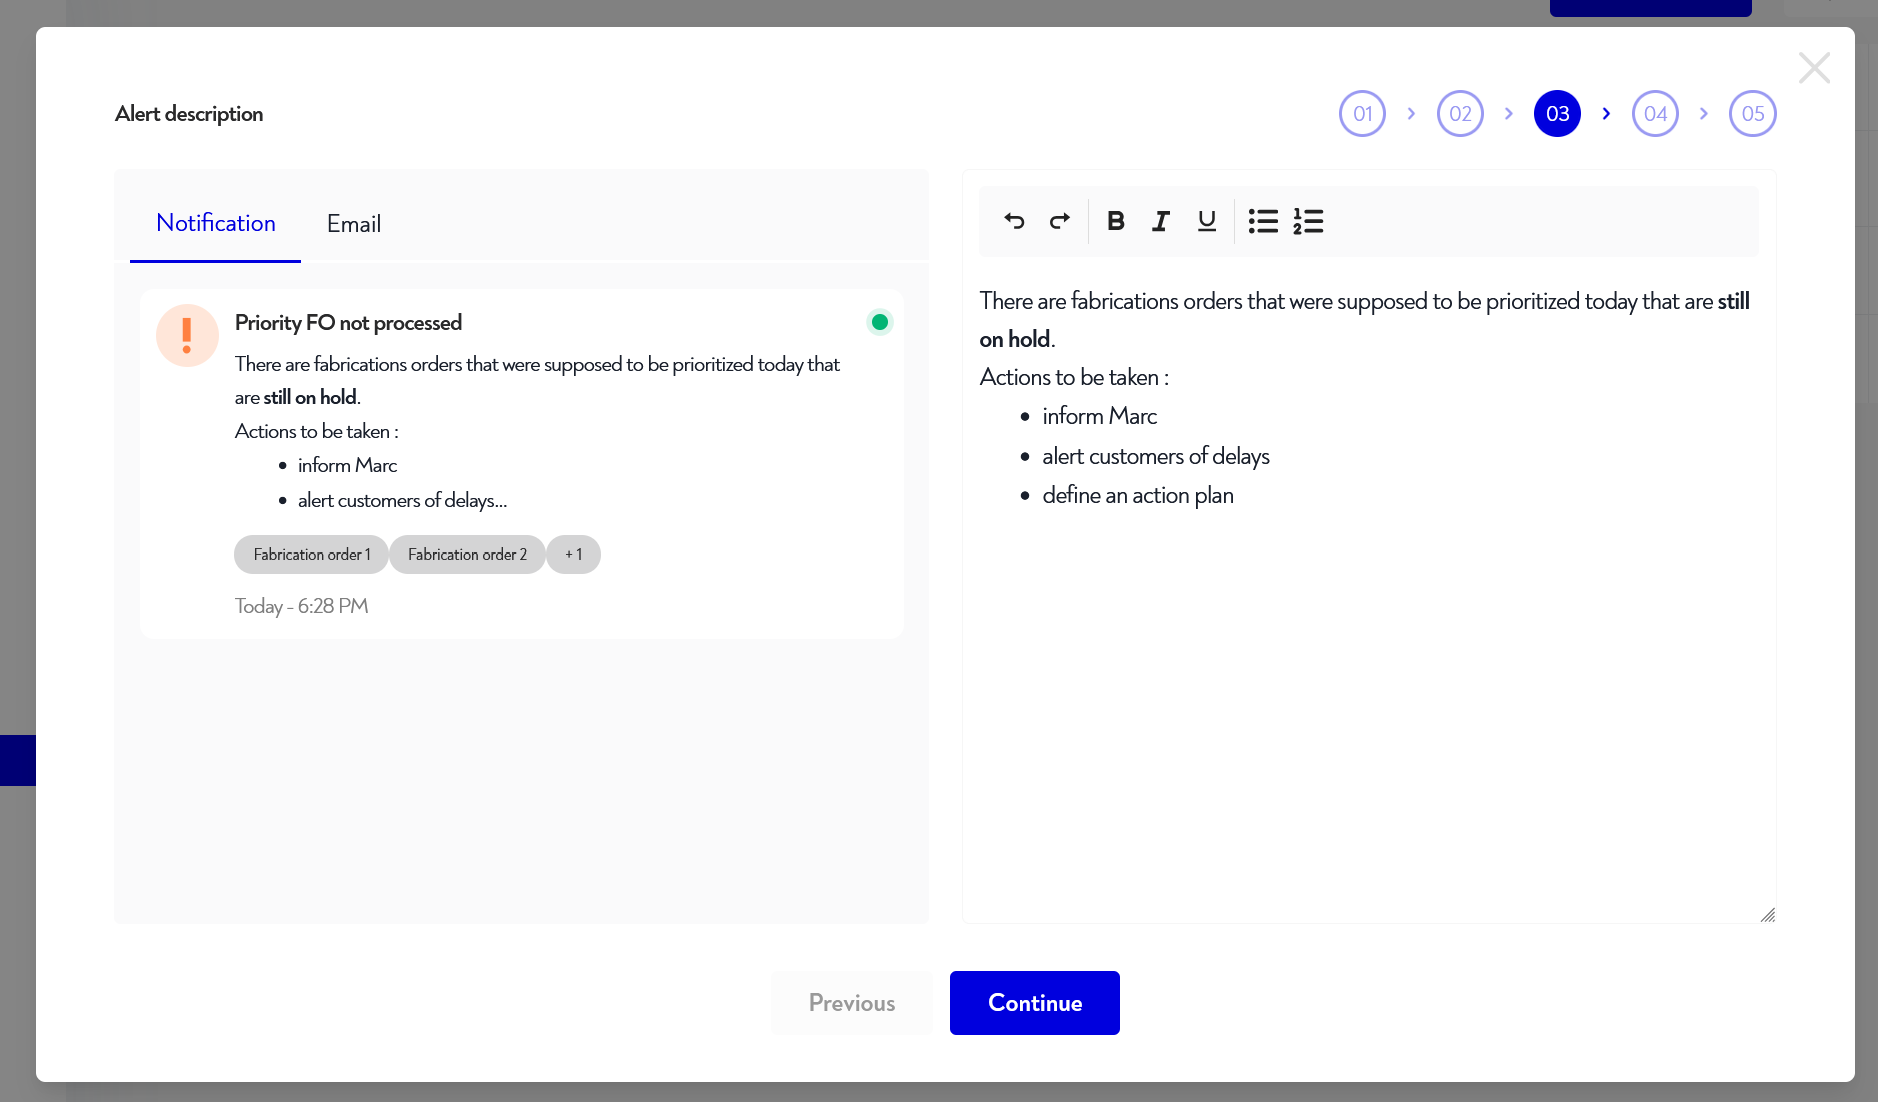
At this stage, you can configure the text you want to put in your alert. You can see the associated rendering in real time in the preview panel on the left. You can switch from notification preview to email preview by selecting the corresponding tab.
You can format the text as you like: bold, italic, underlined, bulleted or numbered.
When you have finished this step, click on the blue "continue" button
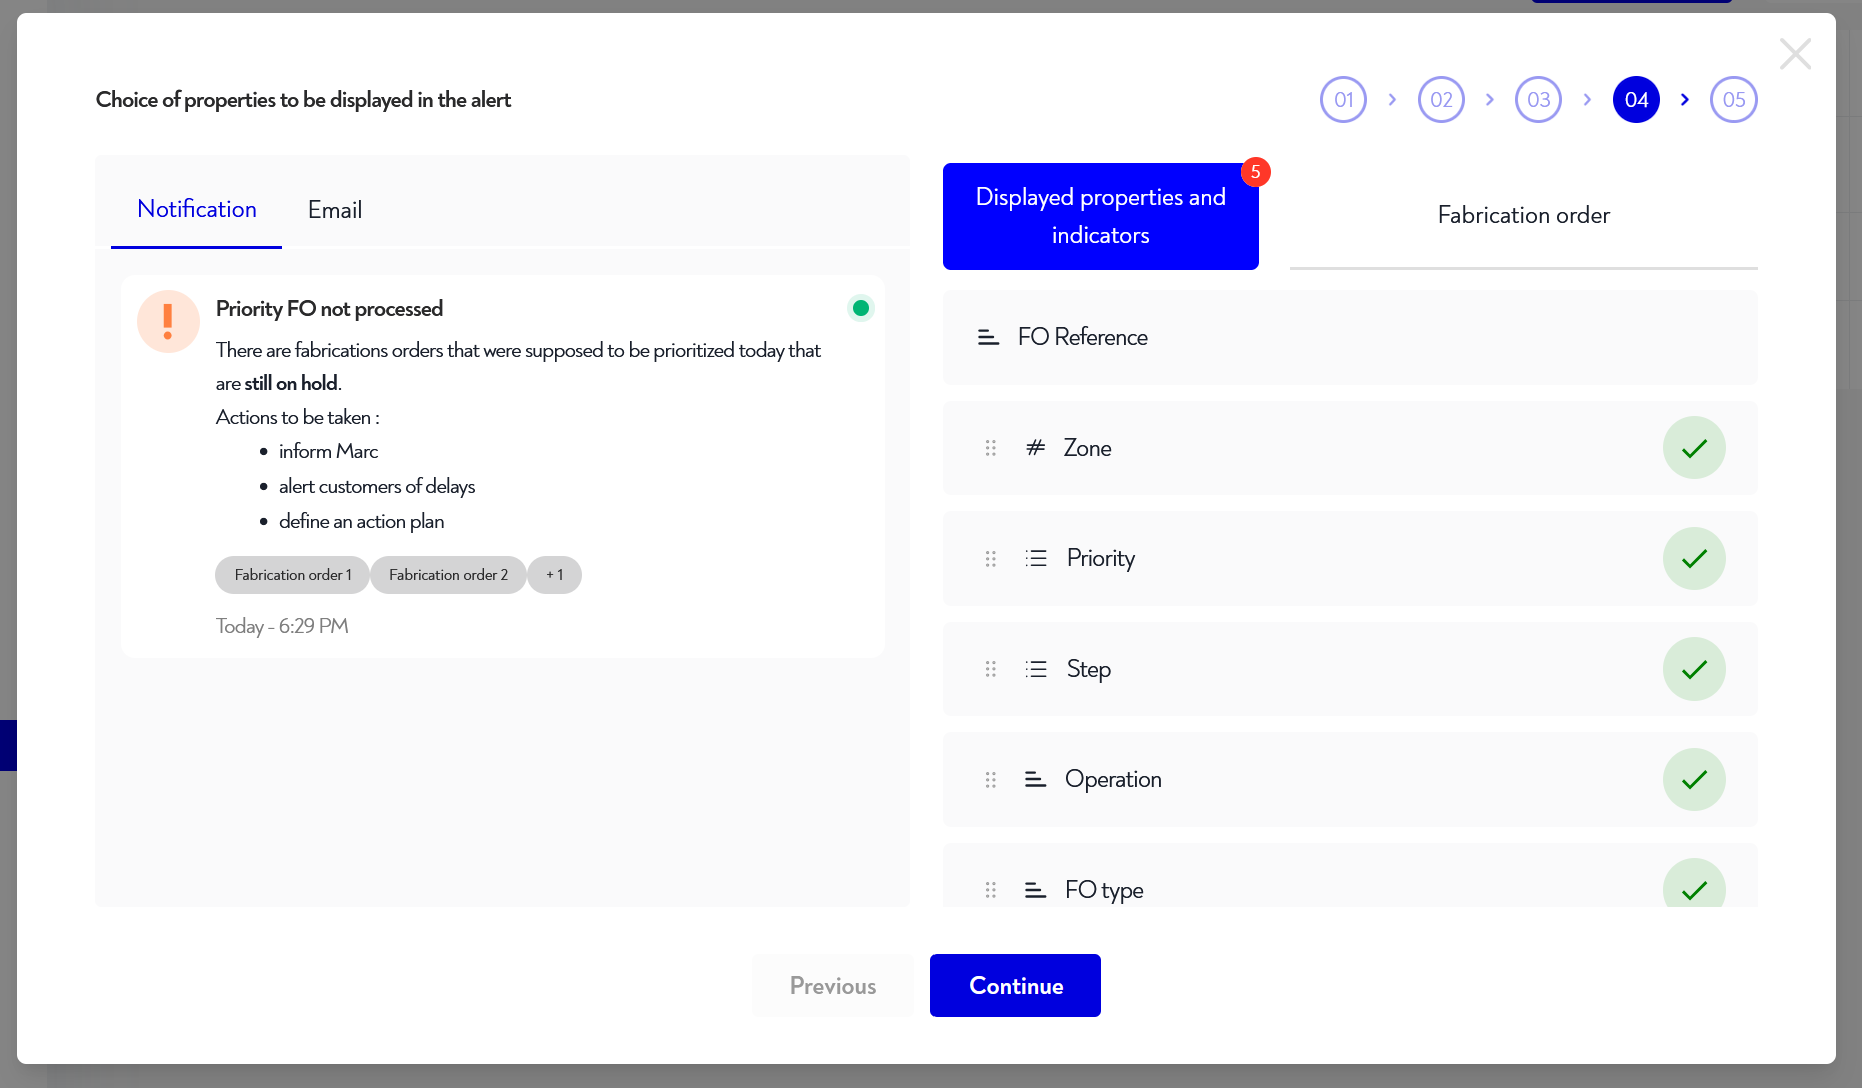
¶ Step 4: Select the properties to be displayed in the alert
At this stage, you can choose the list of properties/indicators you'd like to see in the alert details. To add a property, simply tick it. You can rearrange the display order by drag&drop in the "Displayed properties and indicators" tab
When you have finished this step, click on the blue "continue" button
¶ Step 5: Choice of recipients
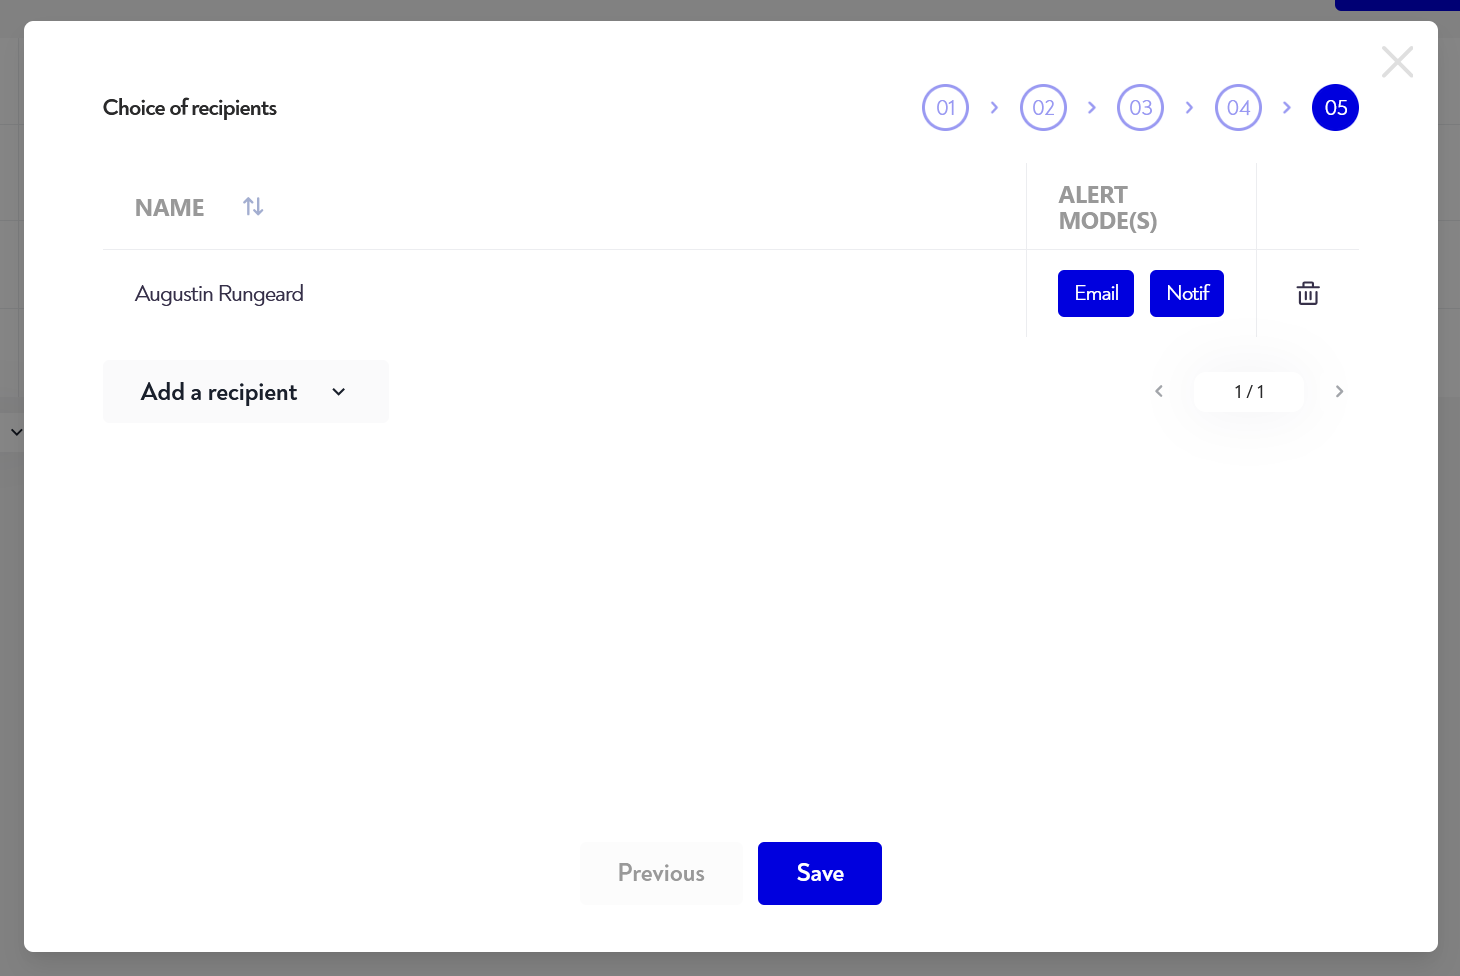
In this step, you choose who to send the alert to and in what form.
For adding a recipient, click on "add a recipient", to choose from :
- a user
- a right group
A pop-up window opens, allowing you to select a user or group. Click on "Add" once you've made your choice.
For each recipient, you can select one or more alert mode(s) by pressing it (it appears in blue if selected) from :
- Notification
For remove a recipient, click on the trashcan icon to the right of the recipient's line.
On sites with rotating beacons, you can add a rotating beacon trigger by checking the corresponding toggle and selecting the beacons to be switched on during the alert.
¶ Activate or deactivate an alert
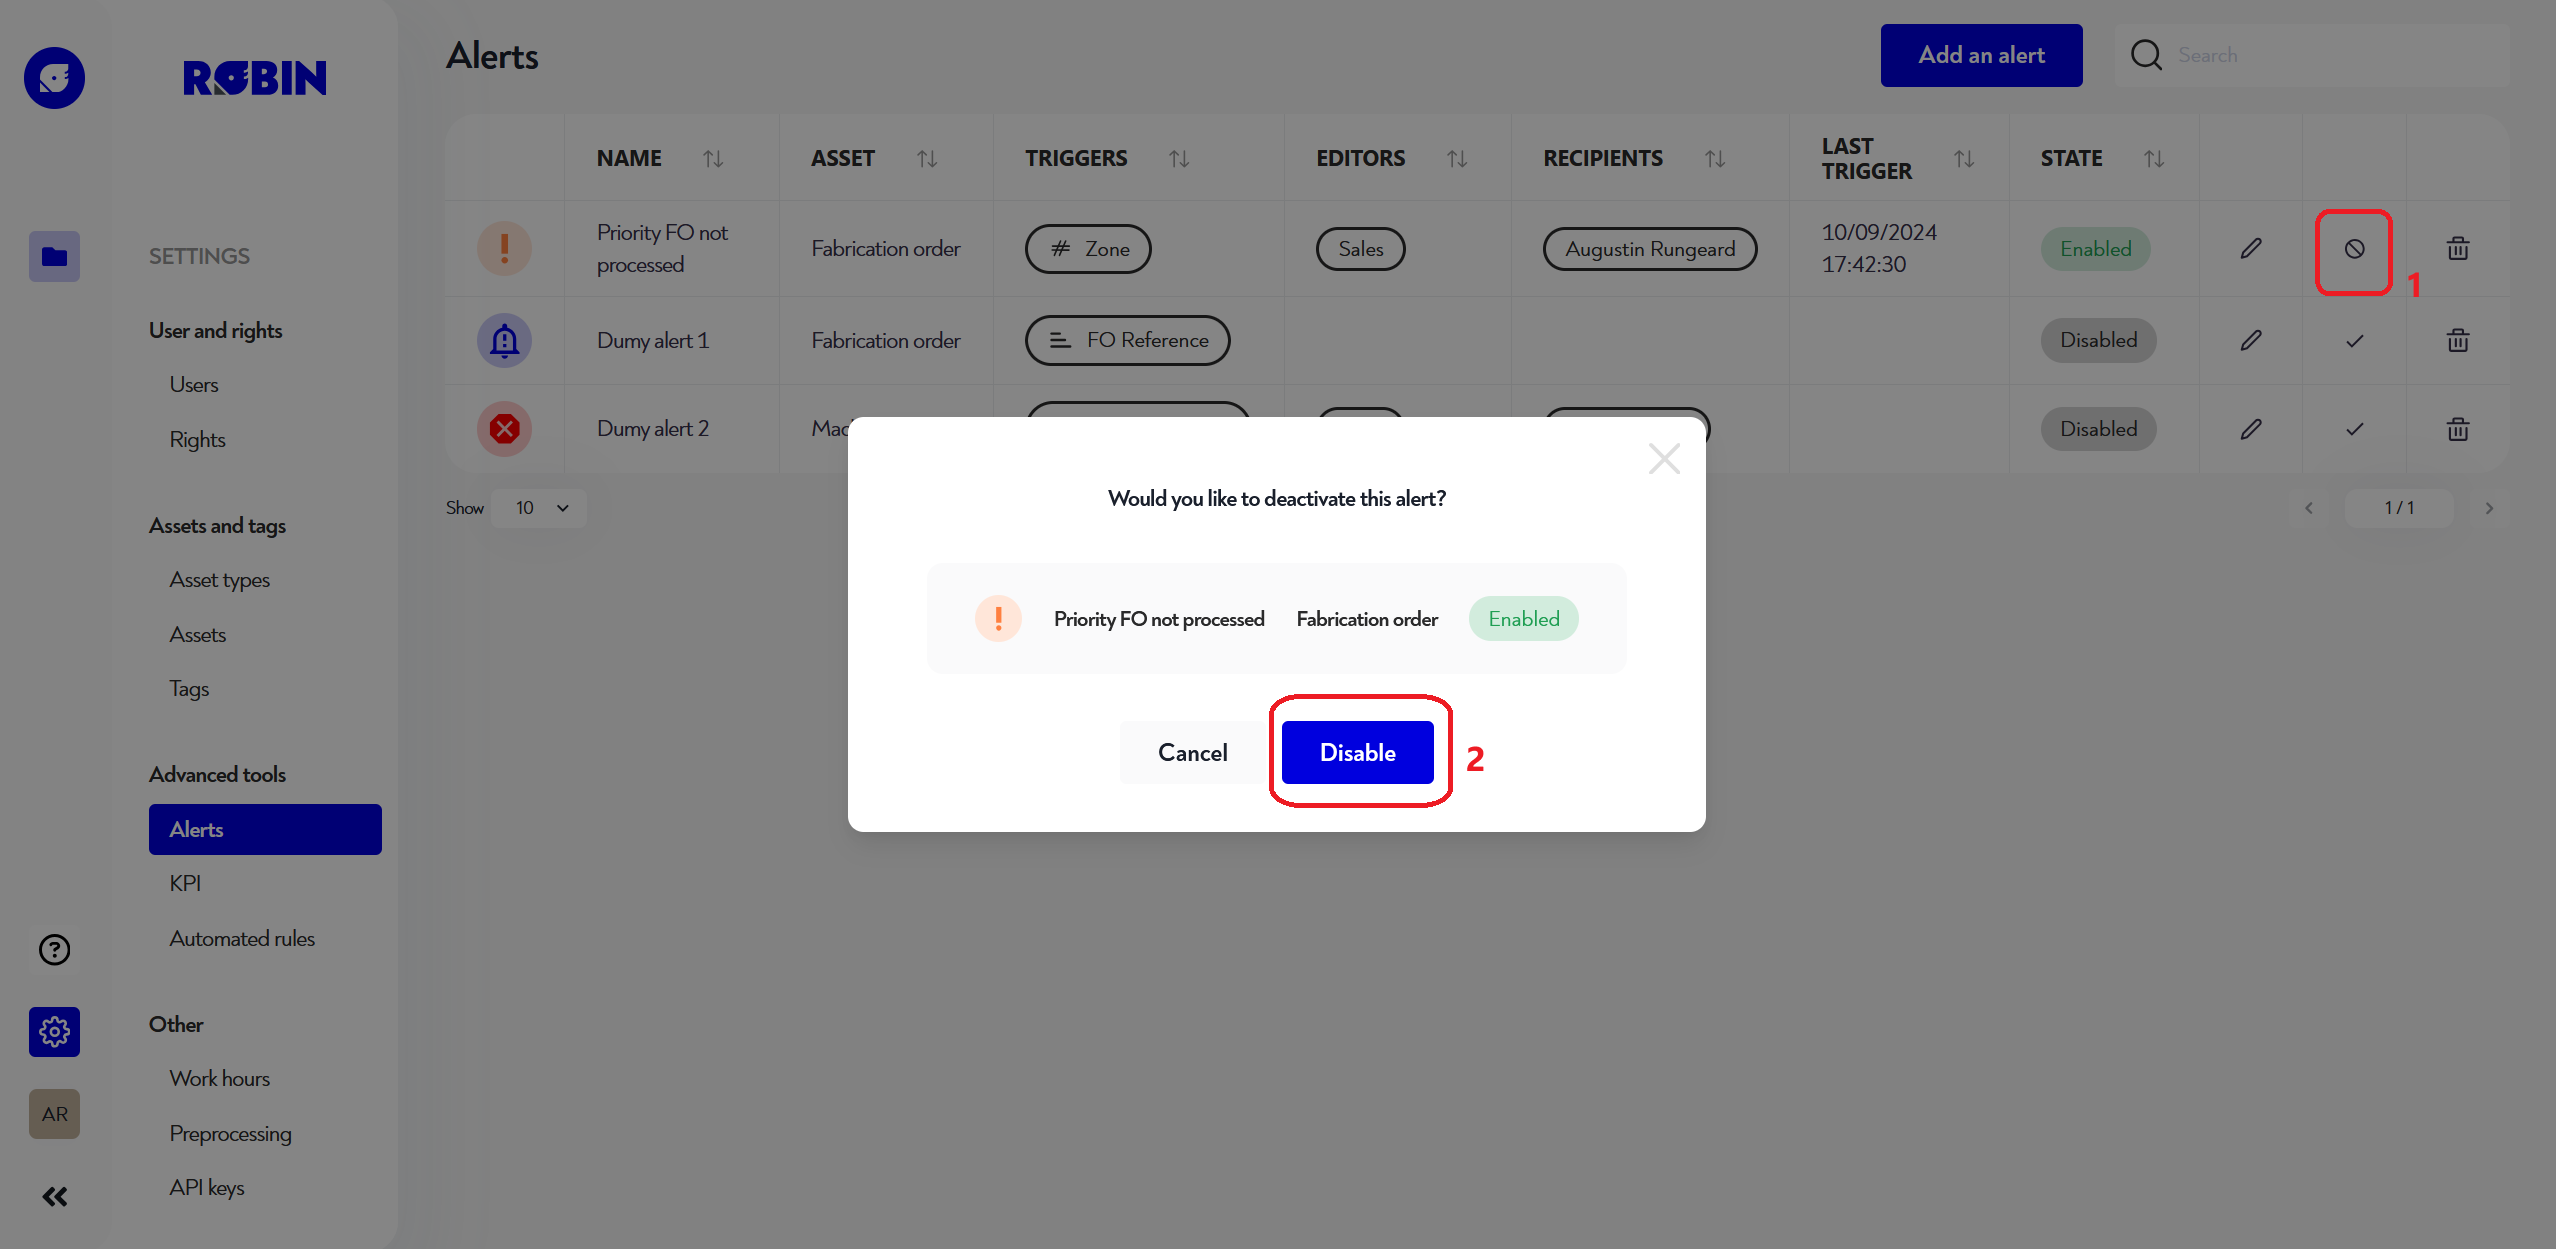
For activate a deactivated alert, click on the check button () to the far right of the corresponding line and confirm activation on the pop-up screen.
For deactivate an activated alert, click on the crossed-out round button () to the right of the corresponding line and confirm deactivation in the pop-up window.
¶ Delete an alert
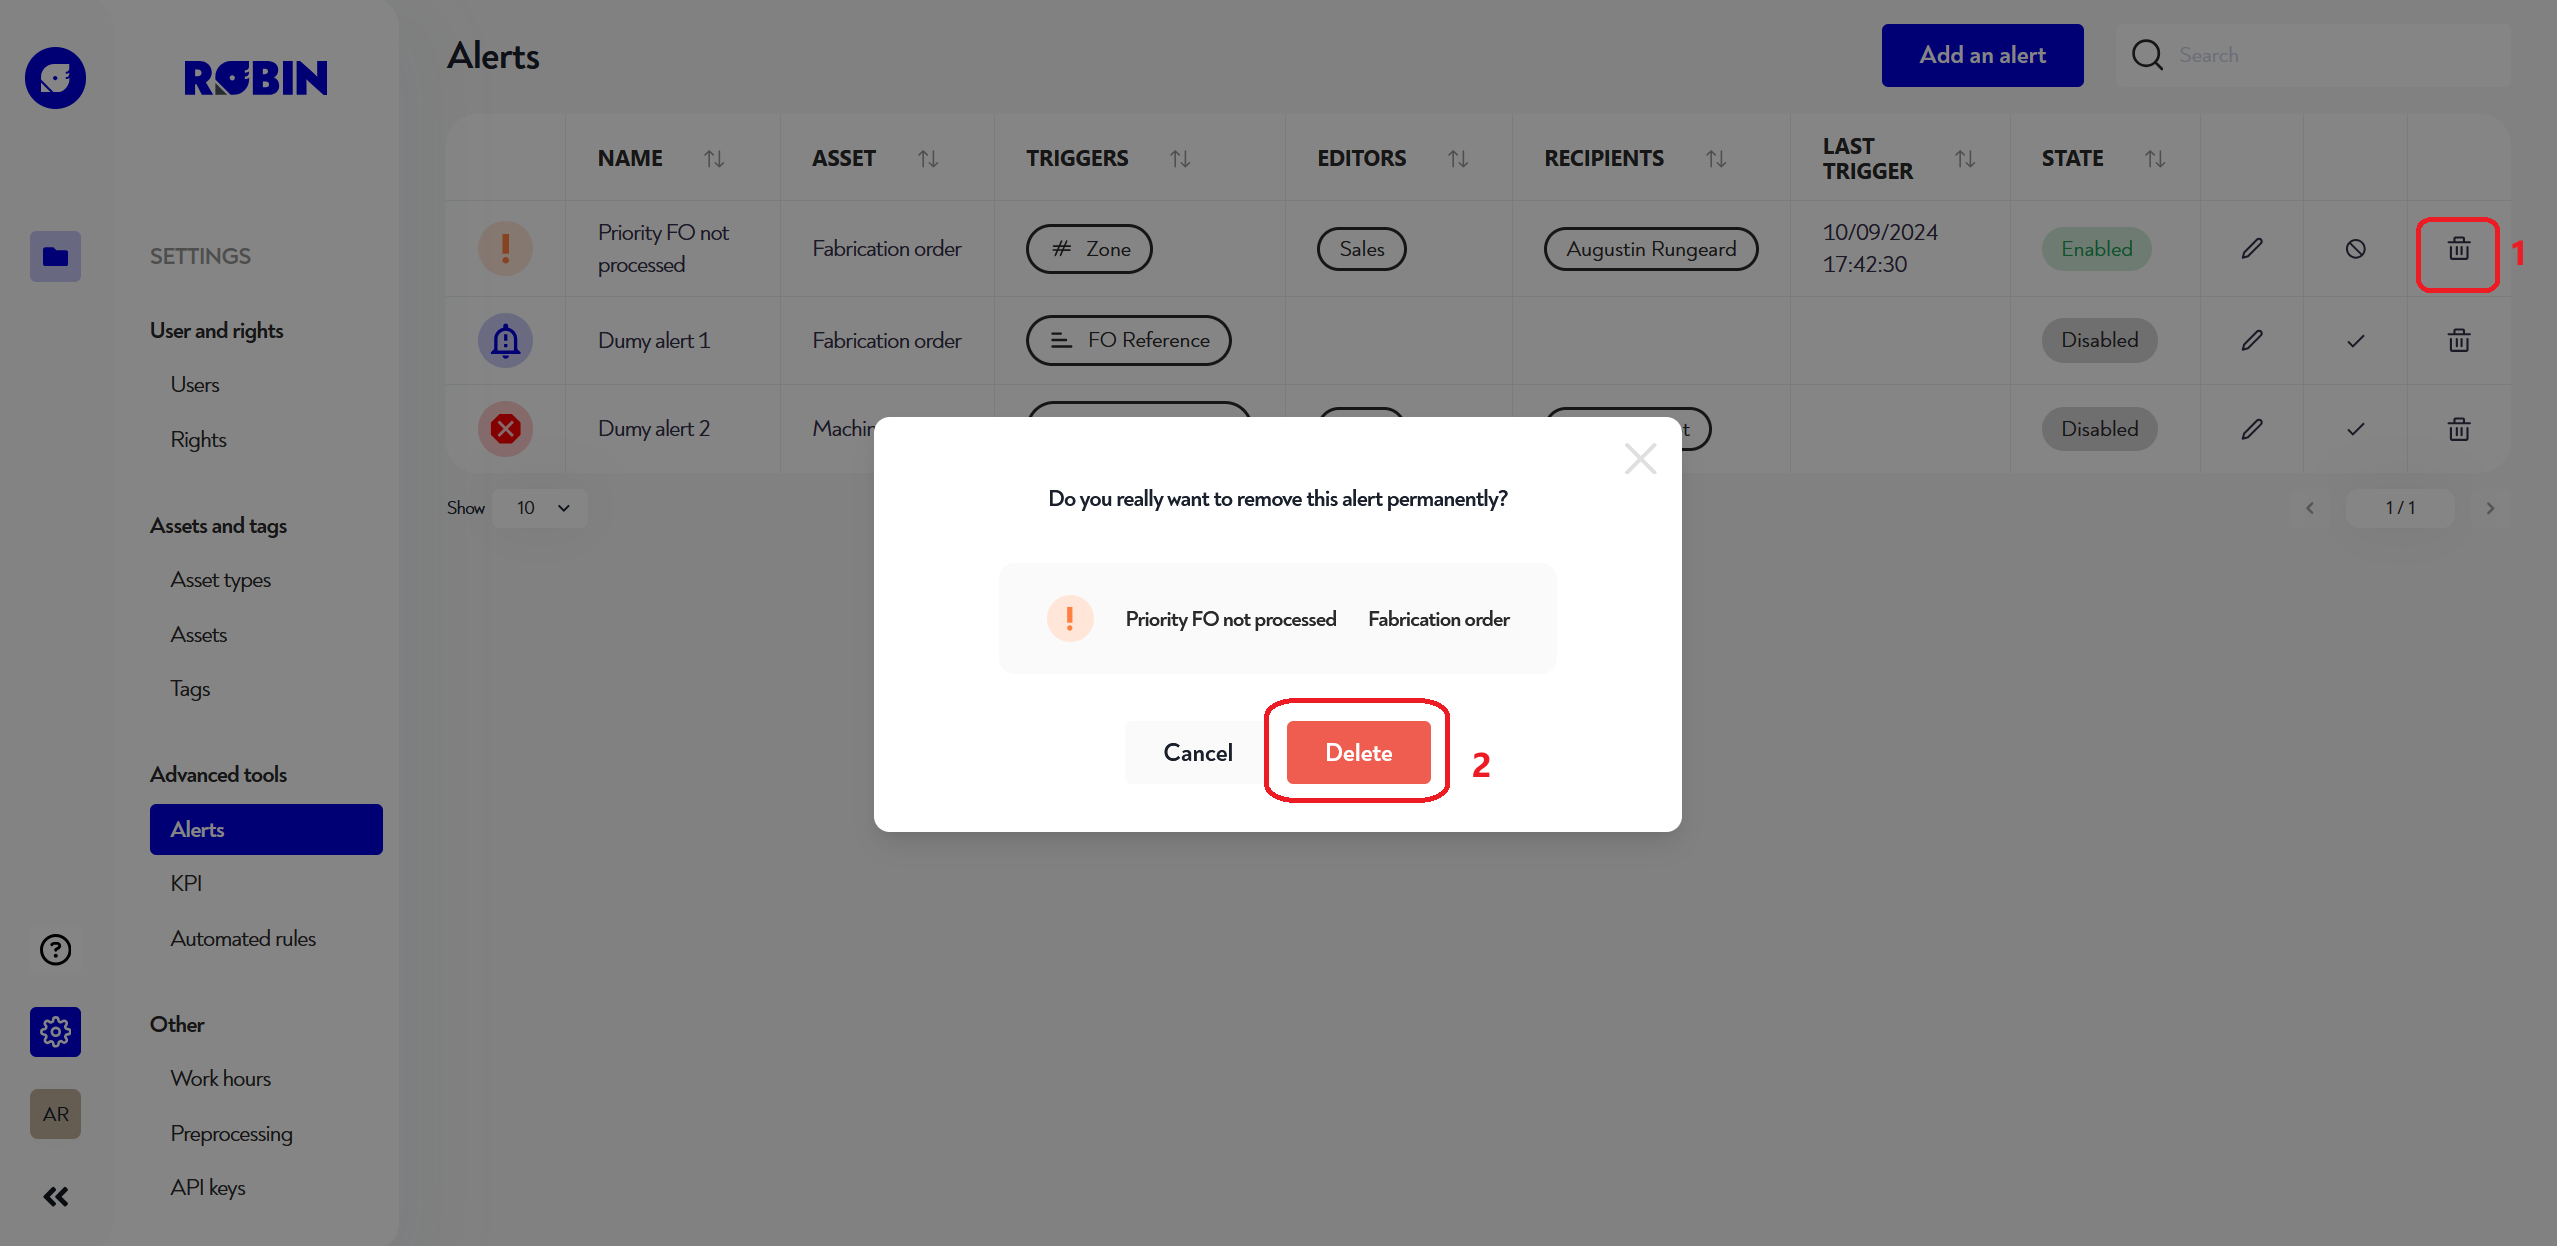
To delete an alert, click on the trashcan icon to the far right of the line containing the alert you wish to delete. A confirmation pop-up appears. Click on the red "delete" button to confirm the deletion.
Is this page unclear or do you need help? Don't hesitate to contact us at support@zozio.tech !