¶ Flow configuration interface
The flow editor consists of two distinct areas:
Left area — Canvas
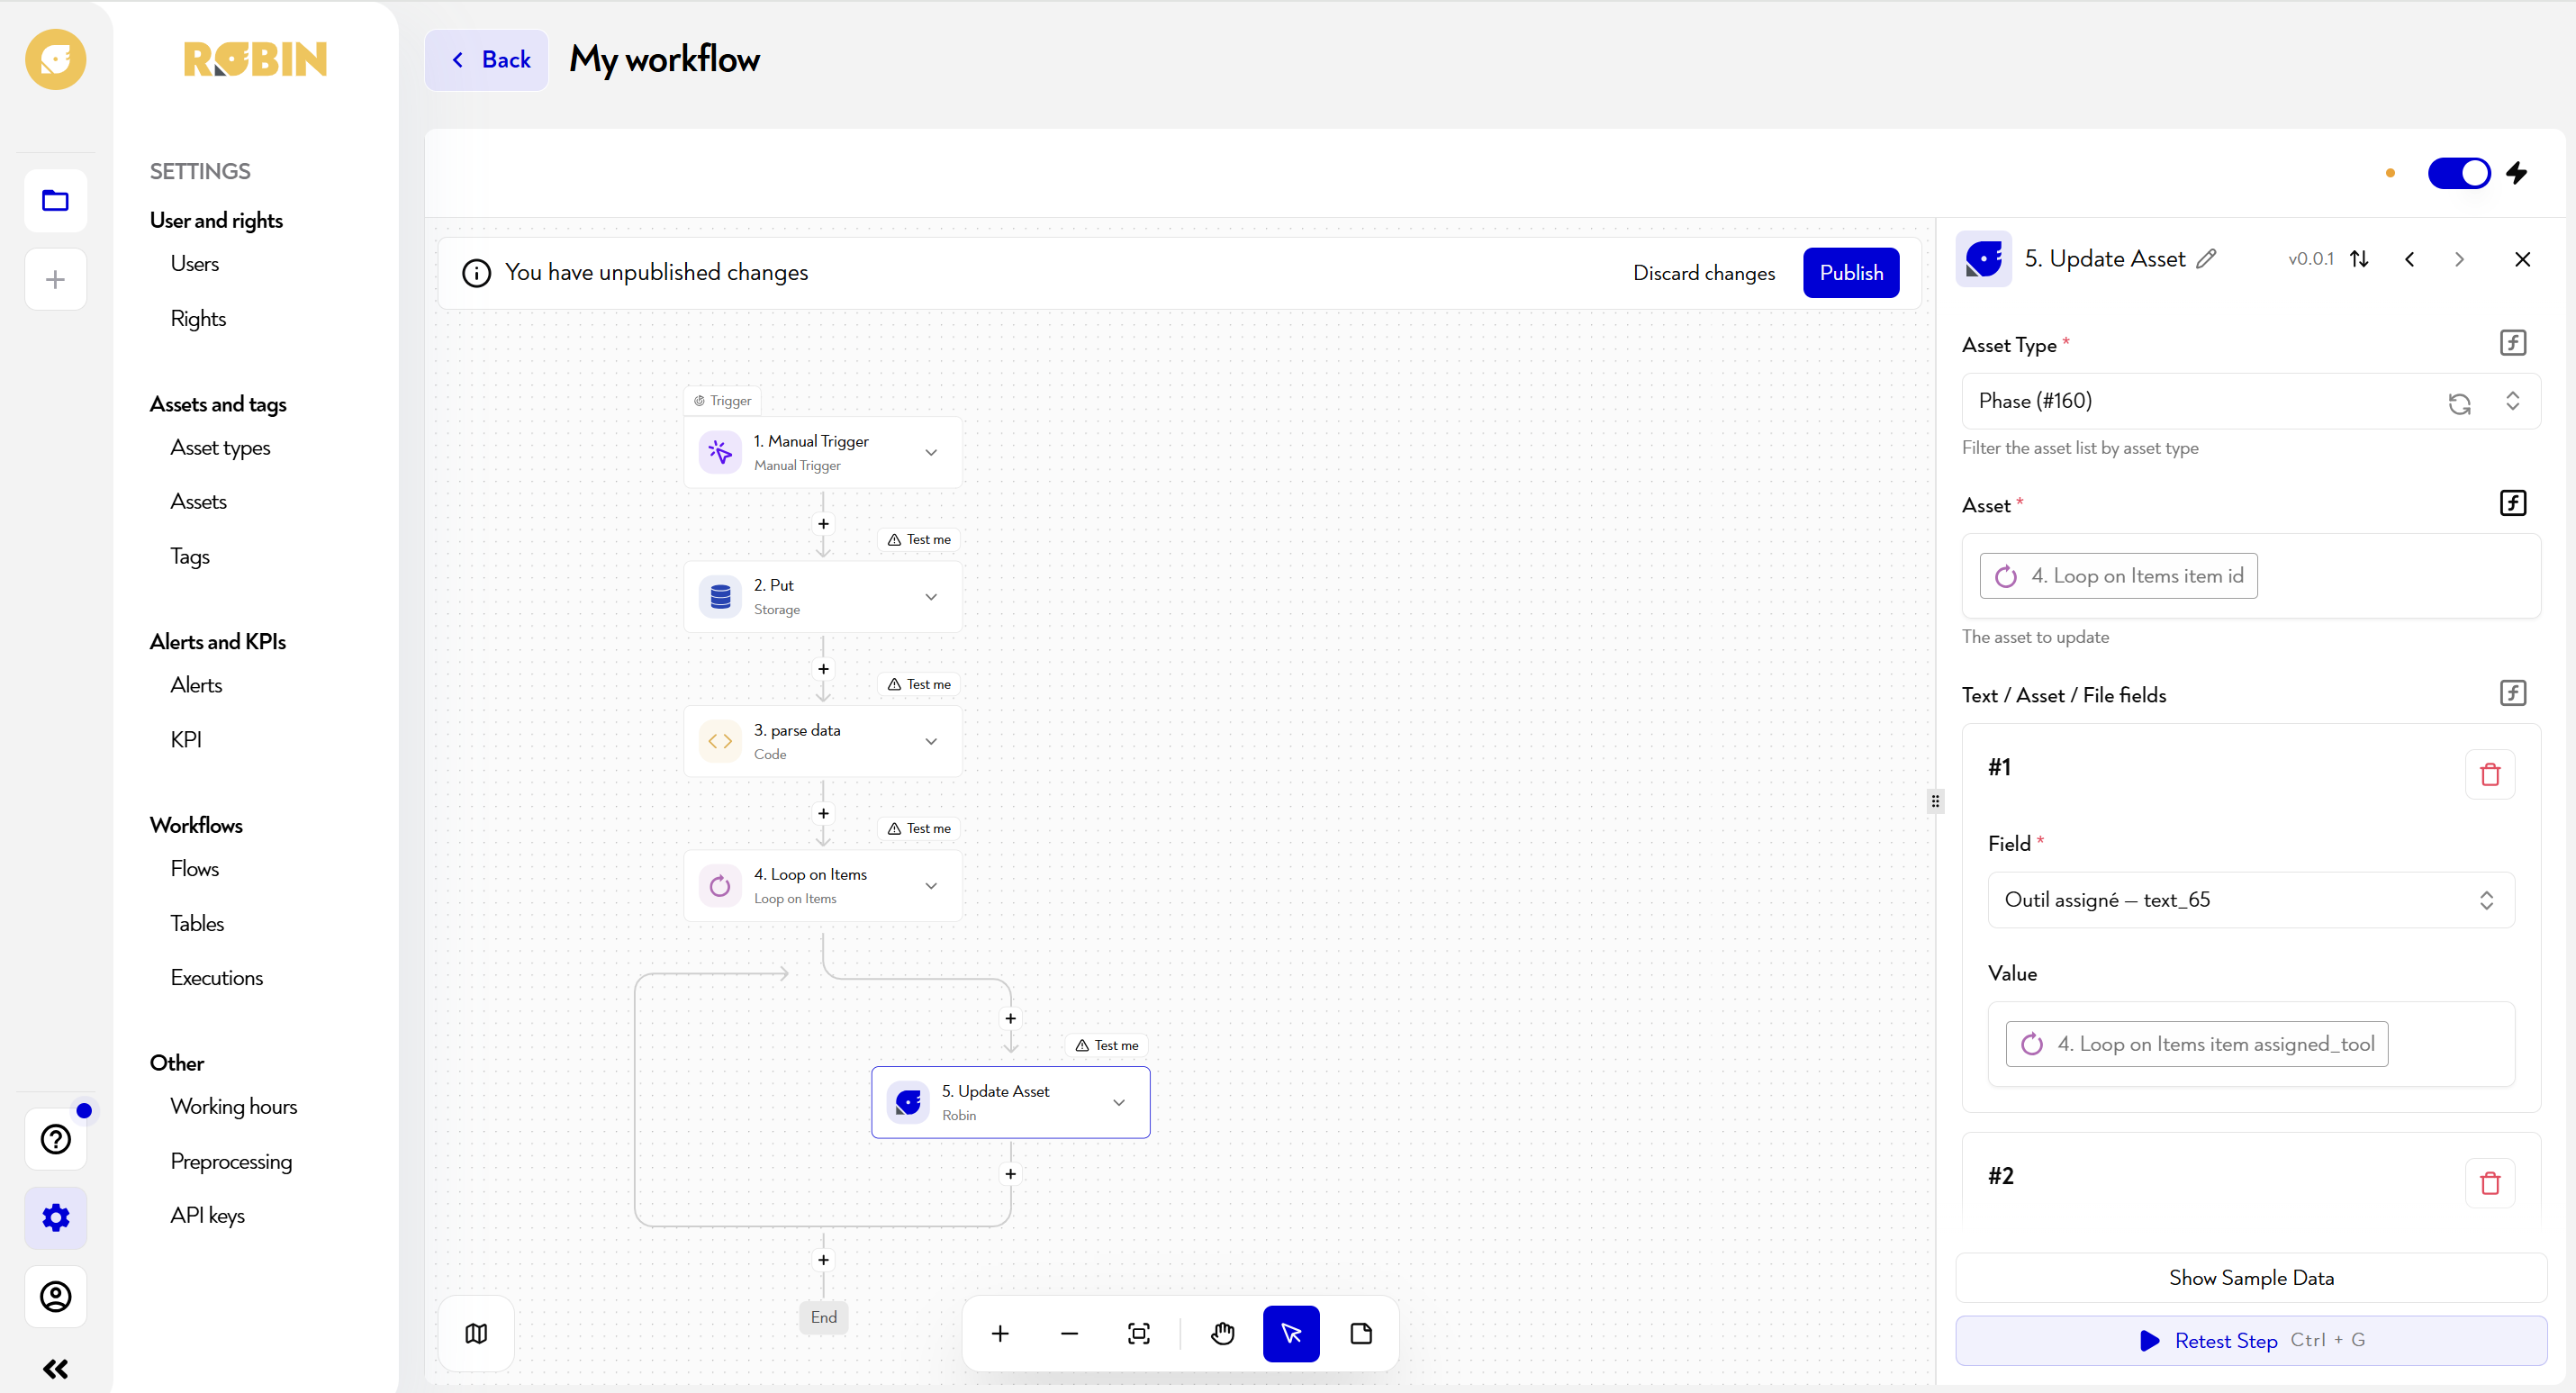
The canvas displays the sequence of workflow steps in the form of interconnected vertical blocks. Each block represents a numbered step (eg. : 1. Manual Trigger, 2. Put, 3. parse data…) with its type displayed in the subtitle. The steps follow each other from top to bottom via connectors +. The loops (Loop on Items) are materialized by a visual return to the child block. A button Run Flow at the top of the canvas allows you to trigger the workflow manually to test it.
Right area — Control Panel
The side panel opens when you click on a step and exposes its detailed configuration. It contains:
- the name of the step (modifiable via the pencil icon)
- the list of parameters to configure to enable the flow to function properly
- a button Test Step to test the step in isolation
The two areas are synchronized: selecting a block in the canvas automatically opens its configuration panel on the right.
In the image below you can see an example with an update block of a selected asset:
Publication and activation
A workflow has two independent states not to be confused:
- Published/unpublished — any modification of the canvas remains in draft until you click on Publish. The banner "You have unpublished changes" indicates that a newer version exists but is not yet active.
- Enabled/disabled — the toggle at the top right of the canvas controls whether the workflow is actually running. A workflow can be published but deactivated (useful for preparing for production without triggering executions).
Publishing without activating has no effect in production. Both actions are necessary for a workflow to be operational.
Each step of a workflow is based on a connector, you can consult the list of Robin connectors for the list of triggers and actions available related to Robin.
¶ Flow configuration example
Here is a step-by-step guided example of configuring a flow:
¶ Other useful information
This page does not seem clear to you or do you need help? Do not hesitate to contact us at support@zozio.tech !